4.1.
Lane Stitch
This stitch is also called "Lazy Stitch" although this term is not appropriate. When you look for instance at a fully beaded cradle cover which takes about two years to finish you can hardly talk about "lazy". It rather takes a lot of perseverance to produce such a piece of art.
When you have decided what to make and chosen a design, you have to determine the width of the rows. This means how many beads you take for your stitch. The Sioux mostly used 8 to 9 beads. I recommend to fit the width of the rows to the whole project. If you are beading a larger area you can take more beads, if you make smaller ones you should also take less beads.
For instance if you make fully beaded leggins rows consisting of 10 beads are ok, but if you plan to make moccasins you should narrow the rows to 6 or 7 beads. It is better, because the surface has several curves and wider rows won't cover the curved areas as good as narrow rows. Also it looks funny if you have a small bag and use only 3 rows with 12 beads, than 6 rows with 6 beads.
Above all narrower rows are more durable, the chance of getting cought and ripping the thread is smaller. The rows are sitting more tight to the buckskin. Just make a test before you start. Bead about 10 stitches with 10 beads and another 10 with 5 beads. You'll notice the difference.
How to start:
First
of all draw the design with your pencil or ballpoint pen on the buckskin.
Then you can optionally draw guidelines in the width of the rows with the
help of a ruler to ensure you are beading straight. If you are working on
a large piece you're gonna ask: "How will I hold this without impeding
myself?"
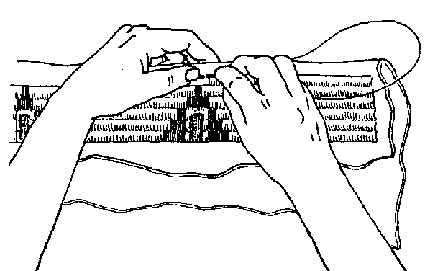
This is the best way. Beginn the first line which is nearest
to your body with the rest of the skin lying either in your lap or on the
table. While you insert the needle you can fold over the leather.
If you are working on a large object, such as a fully beaded yoke dress, it is preferable to start with so called center lanes, like the those running along the shoulder or at the edges.
The first stitches:
Take your thread and make a knot at one end. If you are working with a perlon thread you can simply melt the end to a small knob. Wait a few seconds and press the knob between your fingers until it is flat.
CAUTION!
Be careful that you don't burn your fingers with the molten thread. You have
to wait a few seconds that it can cool a bit.
If you wait too long, the knob gets hard and cannot be flattened.
It takes a bit of practice in the beginning. But after a few times, you will
know how long to wait.
 |
 |
 |
| before
the melting |
the
melted knob |
the
flattened knob |
The next step is to position the thread the right way. The lines have to lie at a right angle to the drawn lines. You should position the beginning stitch near the corner where you are beginning or in the area of the next row. The needle must come out directly in the beginning corner, so that the next few stitches of this line or at least the next row is covering the flat knob of the thread (see pic below).
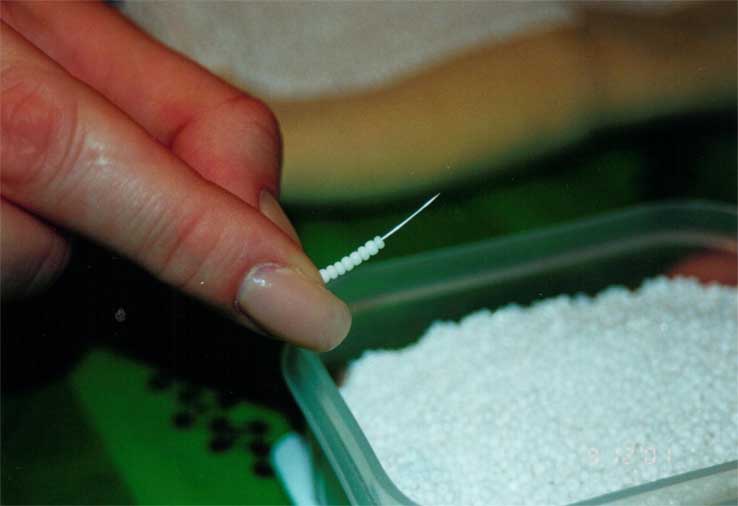
Now
you have to thread the beads and make sure you have the right amount on the
needle. Just dig into the box with the beads a few times until you have them
on the needle. You have to controll how many beads are needed (see pic below),
because some beads are thicker or thinner and you can't always rely on the
number of beads.
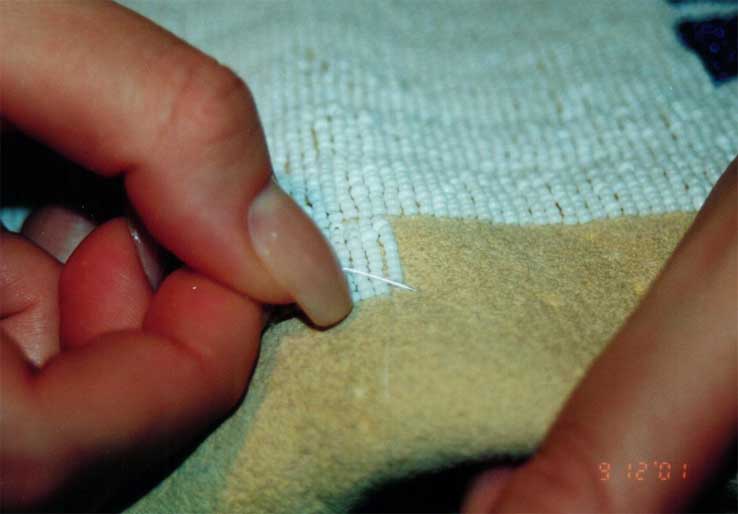
Now push the needle on the opposite side of the lane into the leather. When
you make your stitch you have to check the correct length: it should be about
the beads diameter, that the stitches are lying in the right way. When you
work with guidelines you have to conceal them by taking care that the needle
goes along the outer borders.
 |
 |
 |
 |
| the
start of the row |
threading
the beads |
controlling
how many beads are needed |
the
correct length of the stitch |
I also recommend that you don't push the needle completely through the buckskin and then back again. It is better that you work the "traditional way".
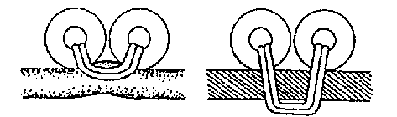 left: traditional
way - right: commercial way
left: traditional
way - right: commercial way
When you just catch the upper surface of the leather and lead the thread inside it is better, because the stitches are invisibel on the back and it is also more comfortable when you wear the leggings or moccasins, because id doesn't scatch while wearing. Above all the thread is prevented from wearing through, if you take a twist, which was the main reason for working this way in the beginning.
But if you are beading on commercial leather, rawhide, cloth or canvas you have to push the needle completely through and if necessary prepunch the holes with an awl. Commercial leather and rawhide need the prepunched holes because they are too hard to get the needle through, while cloth or canvas are too thin to lead the needle inside.
Then you pull the thread through and tug it taut. It is adviseable to press the bead row a little against the buckskin that the rows will align correctly.
Now make the next stitch the same as the first only in the opposite direction (see the sketch below). REMEMBER the correct length of the stitches. From now on it is simply sewing the bead rows zigzag onto the leather.
The end of the thread:
In some time the thread is getting shorter. Before it becomes too short, you have to finish it and start a new one.
Make your next stitch without beads toward the middle of the row in a greater distance (see pic below). The spot will be covered later by the next stitches. Where you come out with the needle make another stitch across that point (you must have a loop by now) and before you pull the thread taut take it thread through the loop and pull. Now you have a simple knot. For a better hold repeat and make another knot on the same spot.
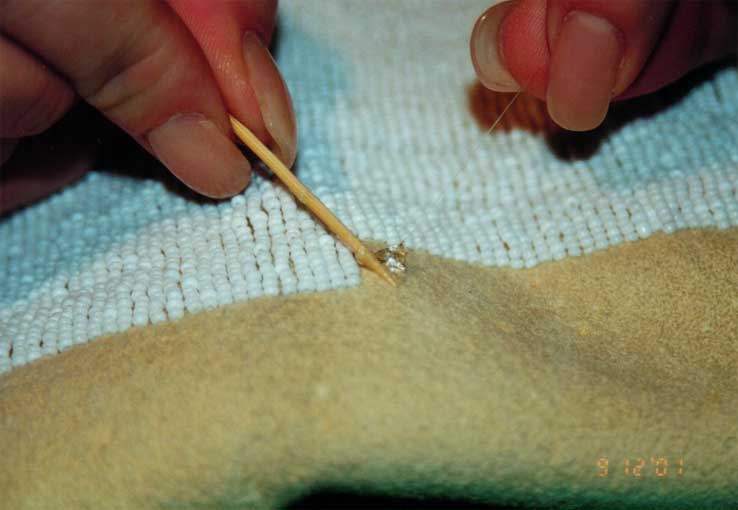
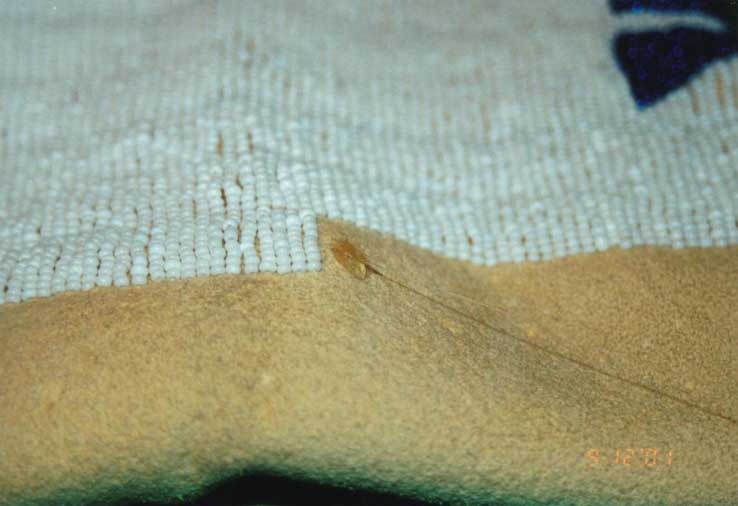
Now take a toothpick and squeeze a bead of glue onto it.
 |
 |
 |
|
|
|
The glue must be spread over the whole knot and a little more around that it covers completely the area. With the small scissors you cut the rest of the thread close to the surface of the glue.
 |
 |
 |
|
|
|
Now you have to start a new thread as described above.
From the second row on it is a bit easier to hold the right distance because you can use the other row as guideline.
When
you have beaded a few rows you're gonna notice, that they are going to build
a slight arch. That is completely normal. When the leather stretches after
a while the rows are going to flatten a bit.
If you look at old pieces of beadwork you're gonna notice, that you have arched
lines mostly from the Sioux and flat lines from the Crow. This is because
they had a different way of anchoring the rows together:
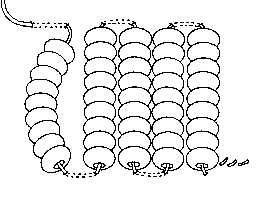
One way is to place the rows side by side (arched lane) and the other way
is to "hook" the thread into the previous lane by stitching underneath
the last bead of the other lane (flat lane).
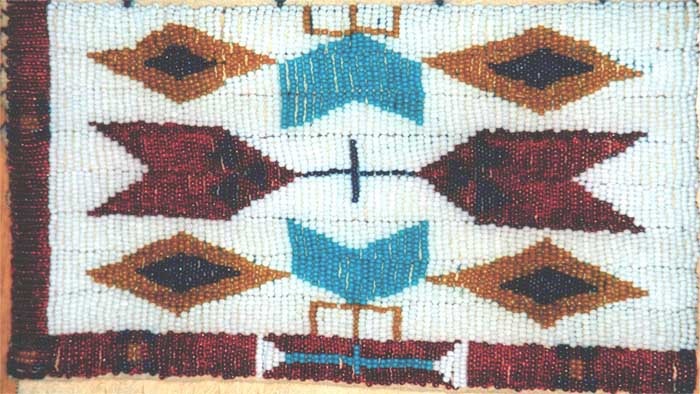
The designs and the colorchanges must be imbedded in the rows. Therefor you have to count how many beads you need from one color and how many from the other.

There are also some cases, where rows of lane stitch are curved. For instance if you look at moccasins or the turtle I made as navel amulet for a friend of mine.
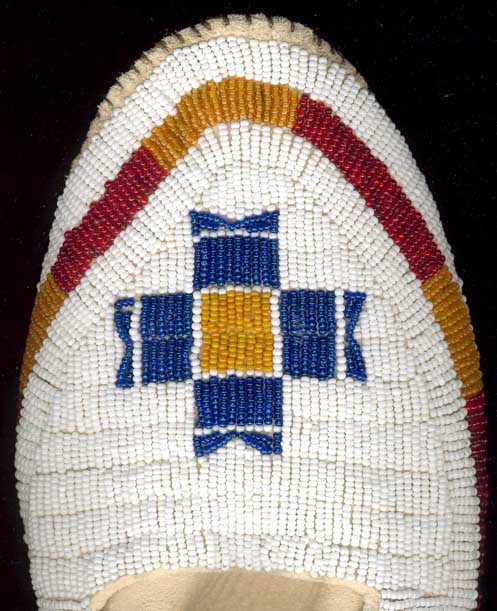
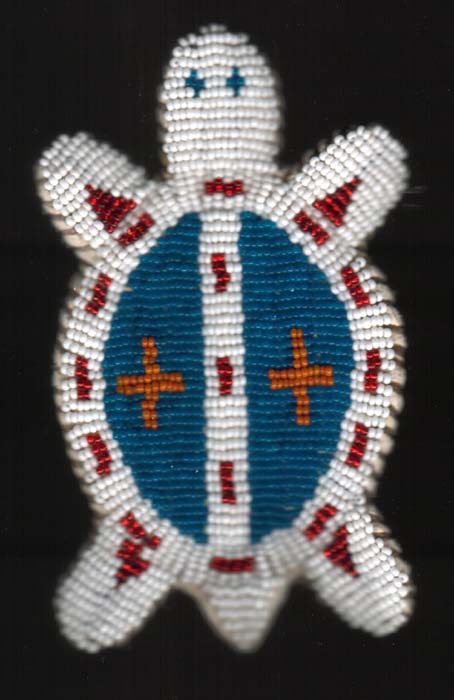
You can see how the lines at the tip making a curve.
 |
 |
 |
All this work was crafted by:
Walter
Mills
(c) Walter Mills
![]()