5. Edge Beading
5.1.
Zipper Edging
5.2. Stacked Zipper Edging
5.3. Rolled Edging
All these edging techniques work on leather as well as cloth (after heming it).
5.1.
Zipper Edging 
This is the one I used most of the time. It is very simple.
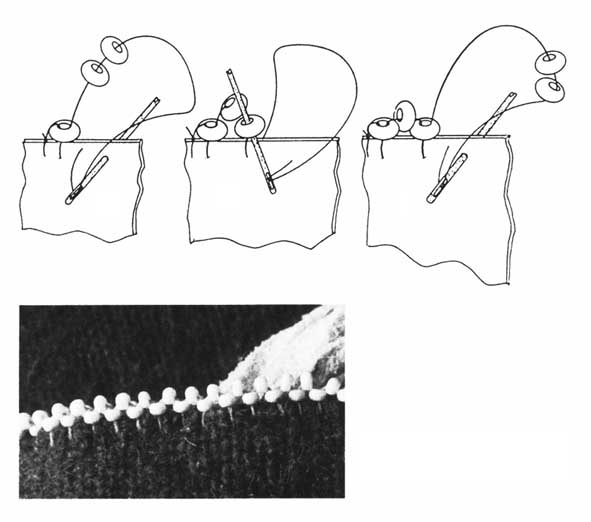
First sew down a single bead:
to
do this you have to fasten the thread. Now take up a bead. 0,2-0,3 cm below
the edge with a distance of about one bead from fastening the thread push
the needle from the front side through the material. Then take the needle
through the bead from below and pull the thread taut.
From now on you'll always take up 2 beads and do much the same. Take the needle
through the leather. But when you return the needle take only the second bead
that the other bead stands upright between the two lying beads.
After a few stitches you'll get the feeling for the right distance between the stitches.
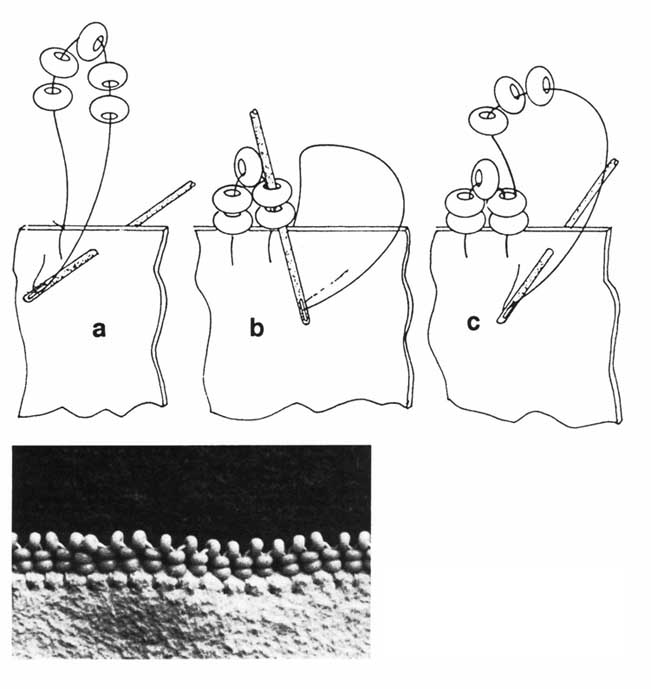
5.2.
Stacked Zipper Edging
Basically it's the same as the Zipper Edging. You just start with 5 beads and take the needlethrough the last 2 beads again. From now on you always take up 3 beads for each stitch.
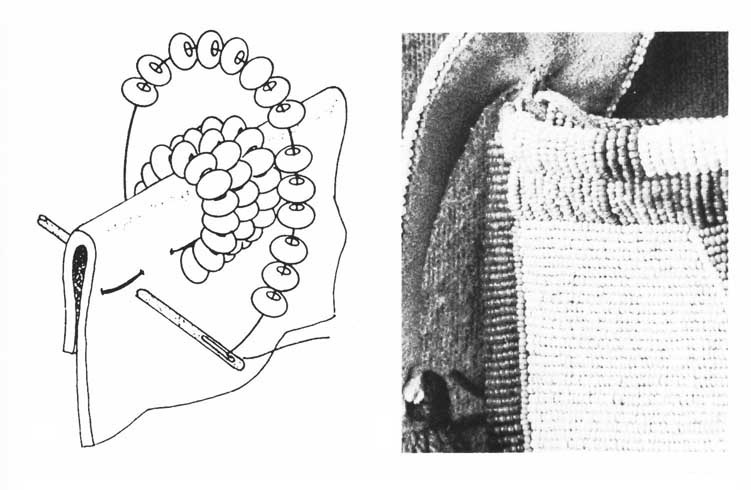
5.3.
Rolled Edging
Basically the technique is similair to the lane stitch.
Fold over the edge of the leather. To facilitate your work, make a few running stitches and fasten down the leather.
Now
take a thread and insert the needle from the outer side inwards. It is important
that you push the needle completely, otherwise it won't work.
Now take up the beads you need. Then insert the needle like before and pull
the thread taut.
You just have to make sure, that the lines are lying straight side by side.