4.4.
Peyote "Unit of three"
This stitch is used to decorate handles from fans or rattles.
Its history lies in the holy peyote ceremony, where it was used to decorate
the gourd rattles.
That is the reason why this stitch is also called gourd stitch.
The original patterns are a "unit of three".
This is the one I'm using.
The also possible "unit of two" is similair to this one.
Information on the history of peyote you can find here!
With the instruction of how to make a beaded keyring, I'm gonna explain the stitch.
|
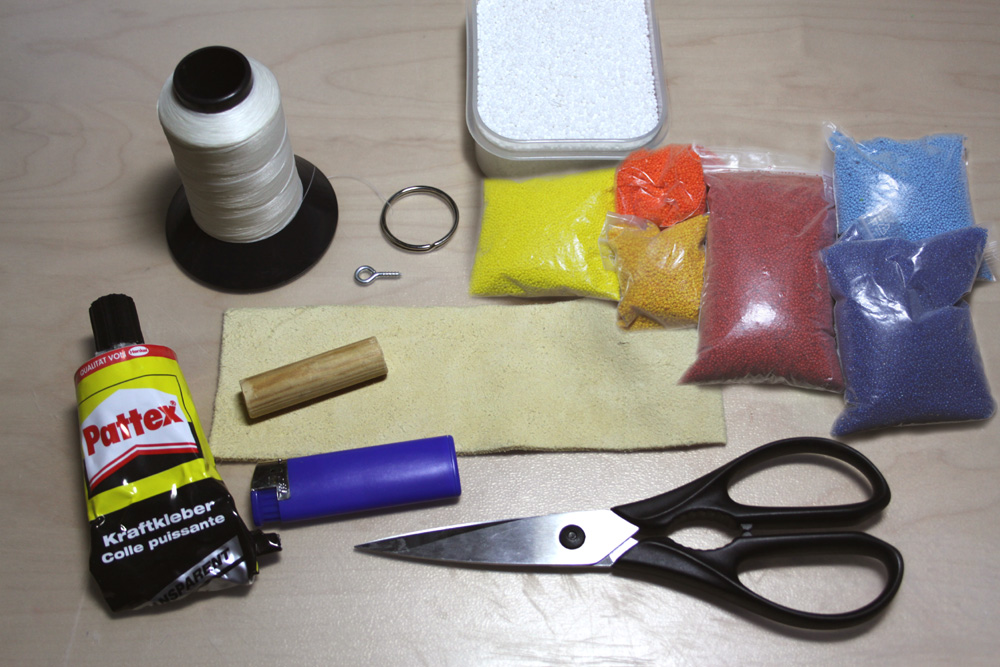
Here
are the things you gonna need. |
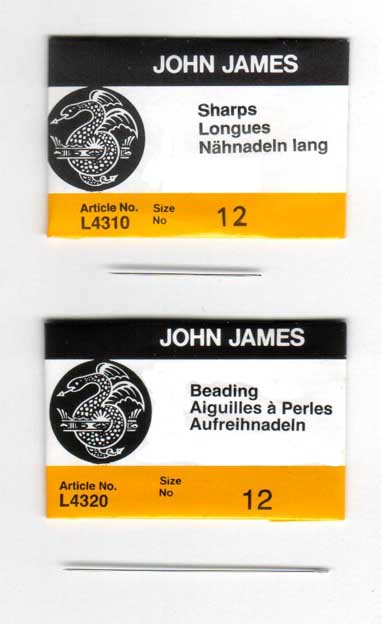 |
As
for the needles I use the short ones since they are handier. |
 |
First
saw the wood (round spar, diameter approx. 12mm), the length you need. I also recommend you smoothen the edges to prevent injuries caused by splinters. Then cut the leather. It should be double the length than the wood, so you can cut fringe. |
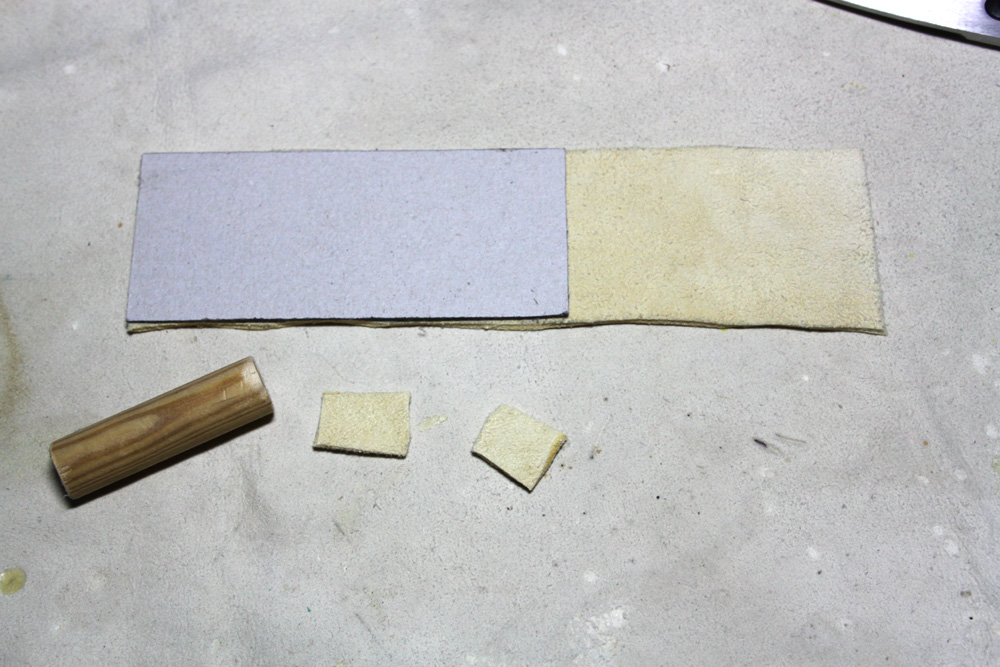 |
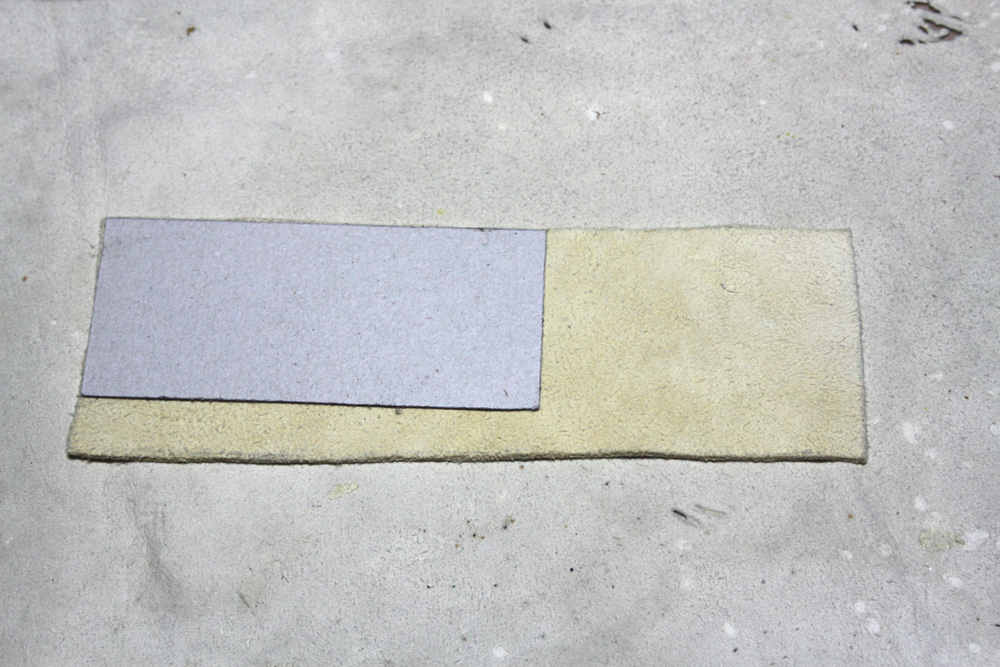
I
use a cardboard template I made with the measurements of the wooden piece,
circumfence and double length. In that case the fringes are about the
length of the beaded part. You also need 2 small pieces for the ends of the wood which I cut only roughly the size needed. |
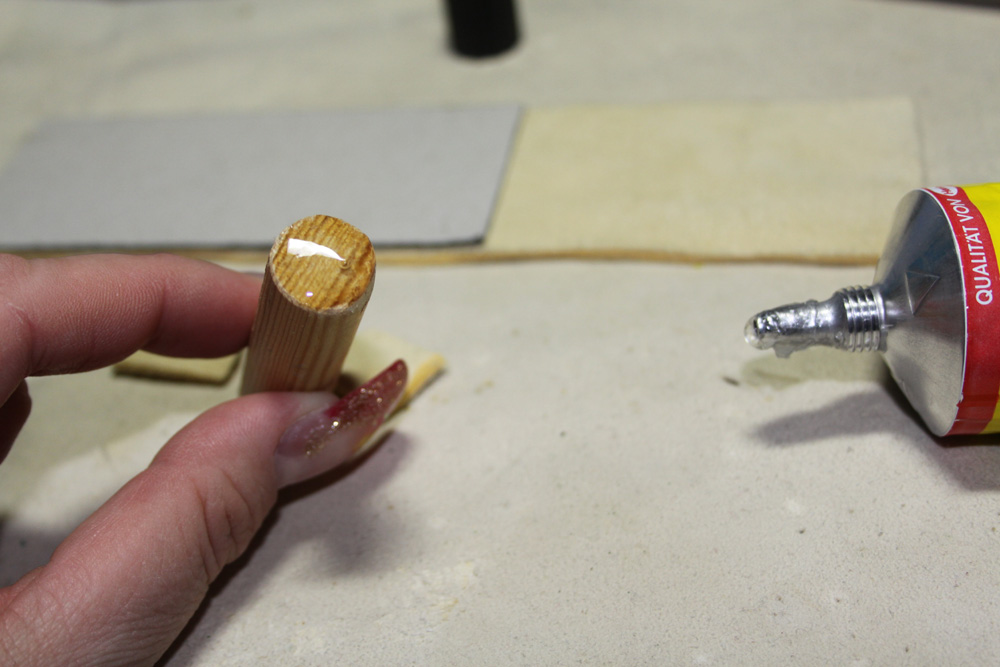 |
Now put glue on to the ends of the wood.... |
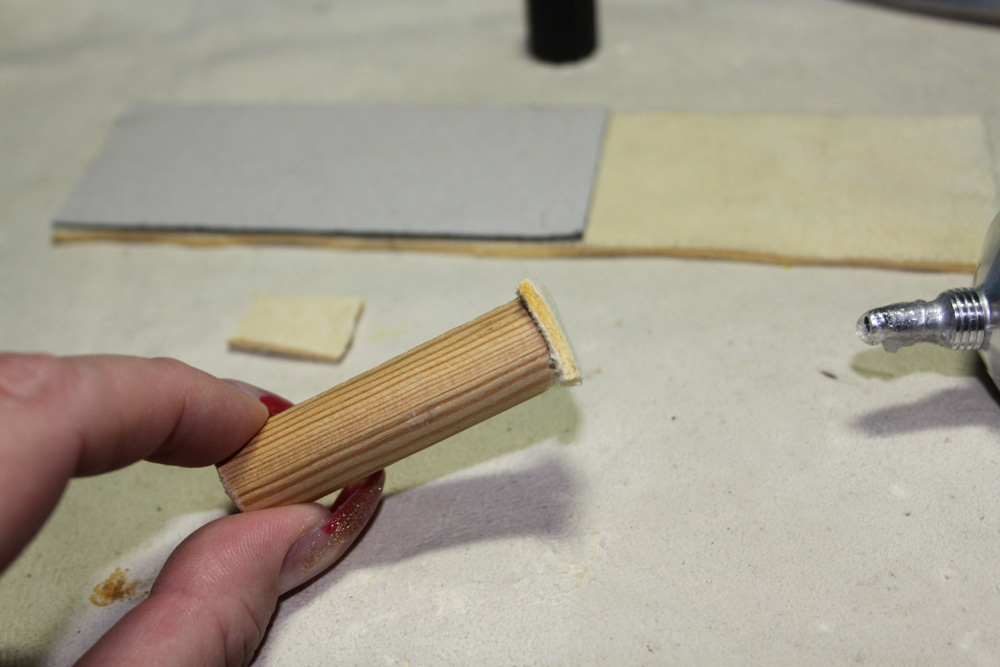 |
..... and put the small leather pieces onto the glued ends. |
 |
Allow the glue to dry which takes about 10 to 20 minutes, depending on the brand you use. |
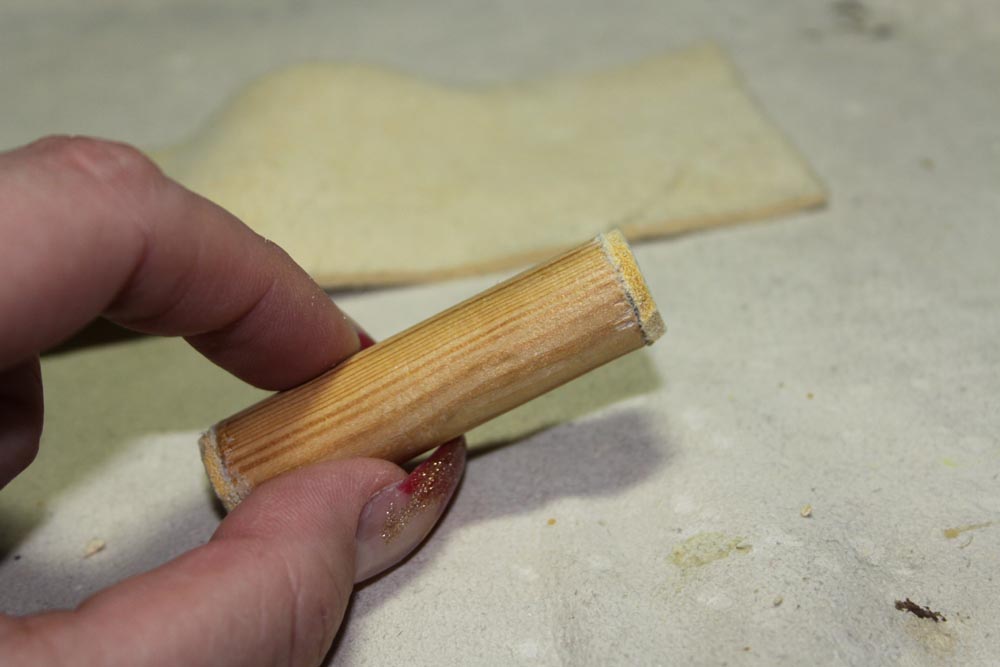 |
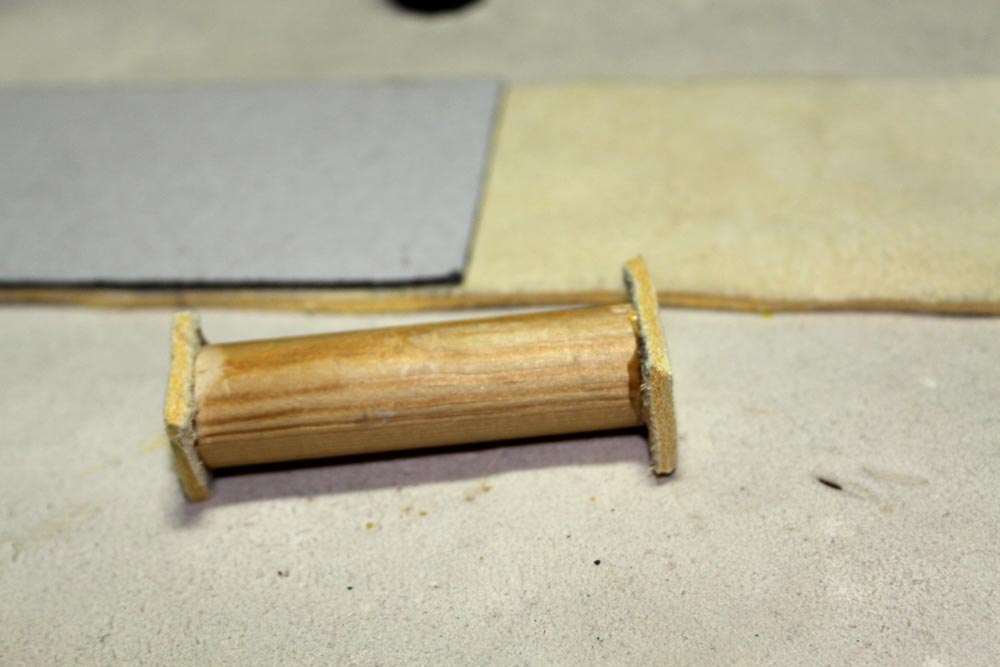
When the glue has dried cut the excess leather. |
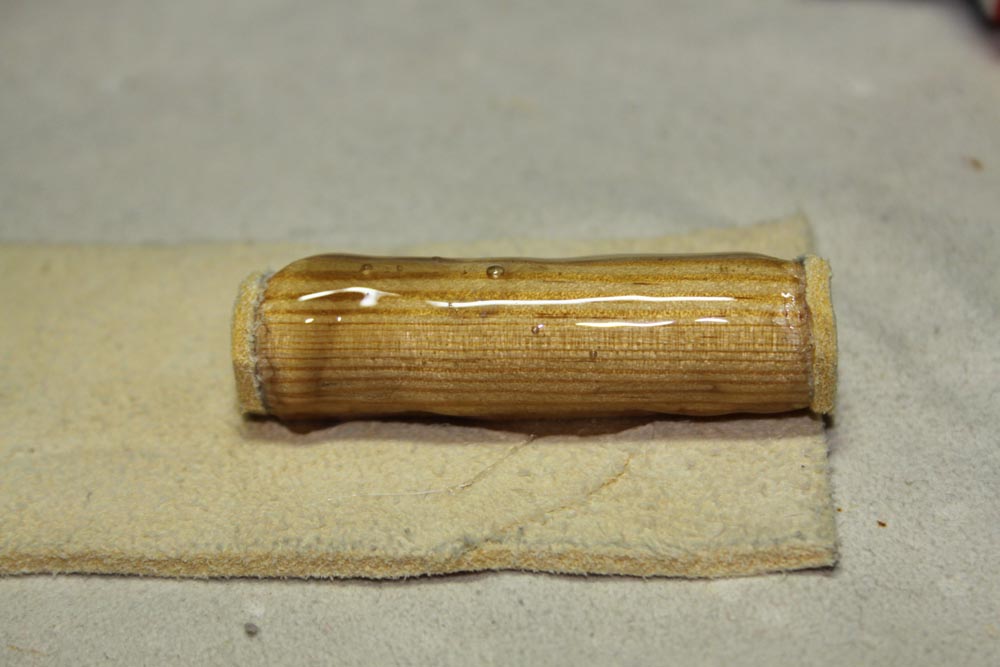 |
Now put glue around the shaft of the wood and place it on the large leather piece with the edges aligned like you can see in the picture. |
 |
Wrap the leather around the glued shaft tightly and again let the glue dry completely. |
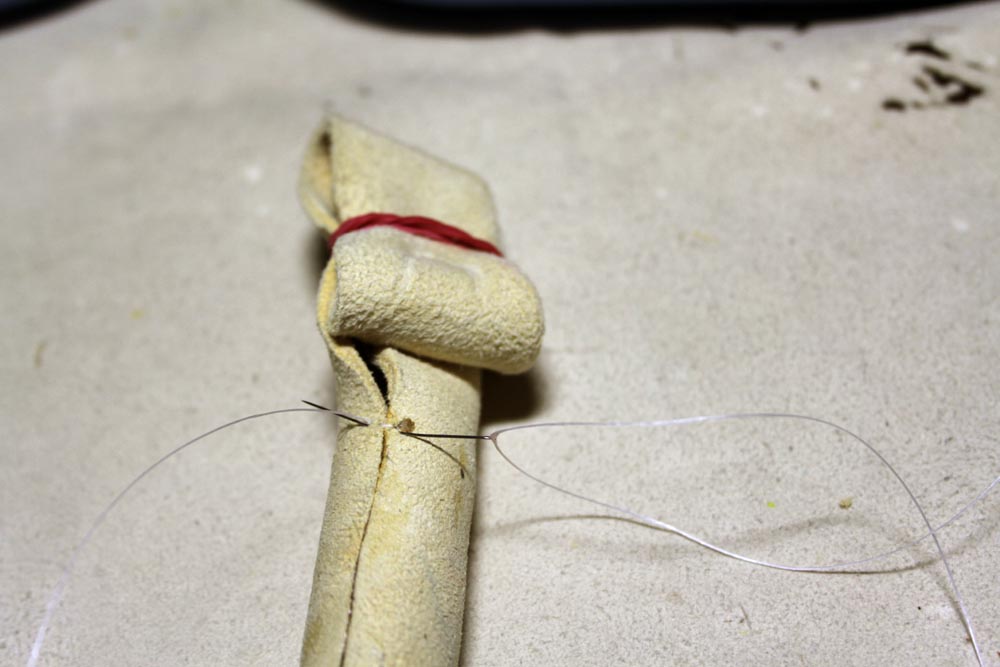 |
When
the glue has dried you can start beading. I always bind the leather that is designated for the fringes together, so the thread won't tangle easily. |
Now you have to determine the length of one round, to check out the design.
 |
Pick
up as much beads as it takes exactly to go around the shaft. Remove
surplus beads and count. For example, if you end up with 53 beads, another bead should be added to make 54. A third of the total - 18 beads - in this example - must be removed and you can begin with beading. |
The thread containing the remaining two-thirds of beads again is wound around the shaft.
 |
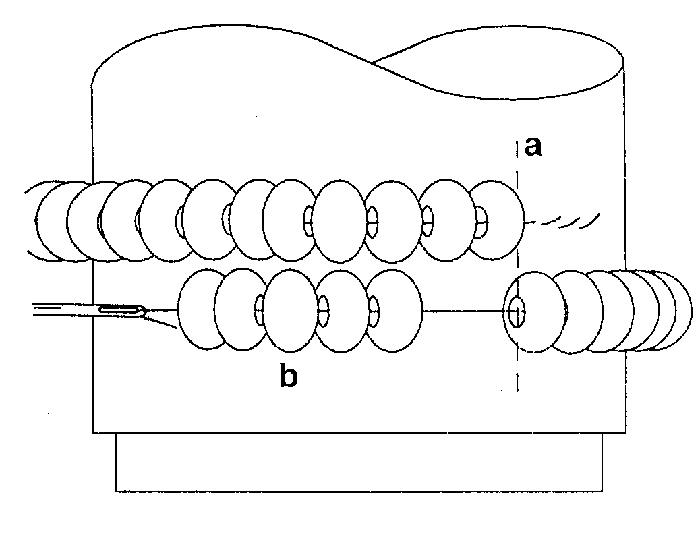
The needle passes through the very first bead. The way the needle passes through the beads establishes your working directon, which depends on your being left-handed or right-handed. While holding the beads with the thumb of the other hand next to the very first bead, lightly pull back the thread into the opposite direction to take out any slack in the initial wrapping. You should hold the beads on the thread with your hand, while working in the first four or five new beads to maintain a constant tension. |
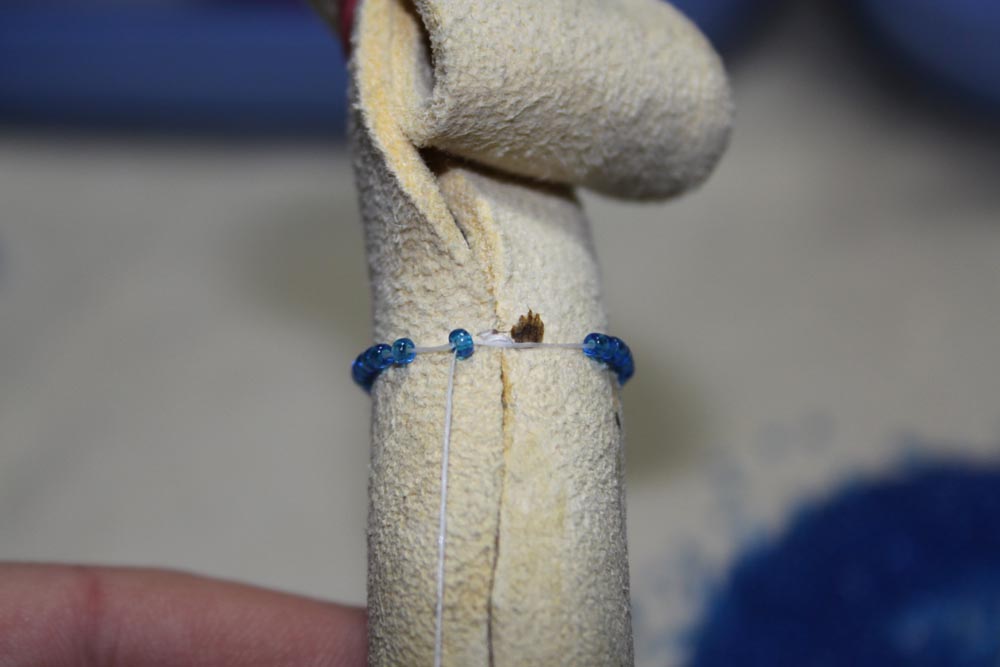 |
Now you are ready to take up the first new bead.
 |
Skipping the next bead of the row, the needle is passed through the following one. But remember to pull the thread taut in the same backward motion as described above. |
 |
|
 |
You can see how the new bead is pressing down the skipped bead. |
 |
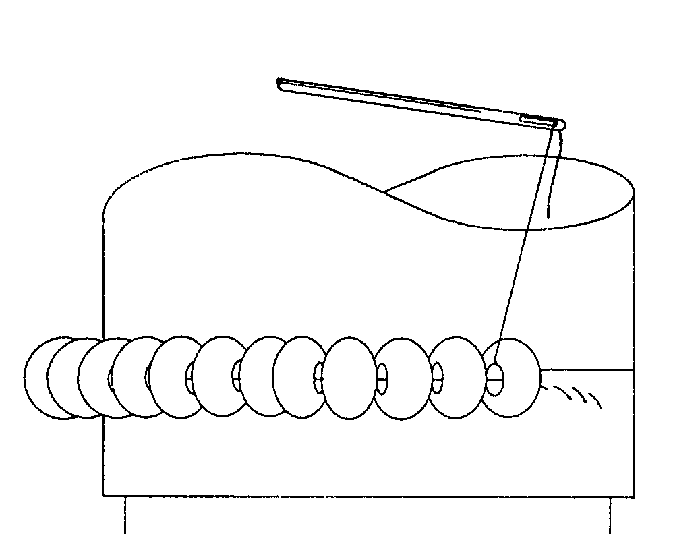
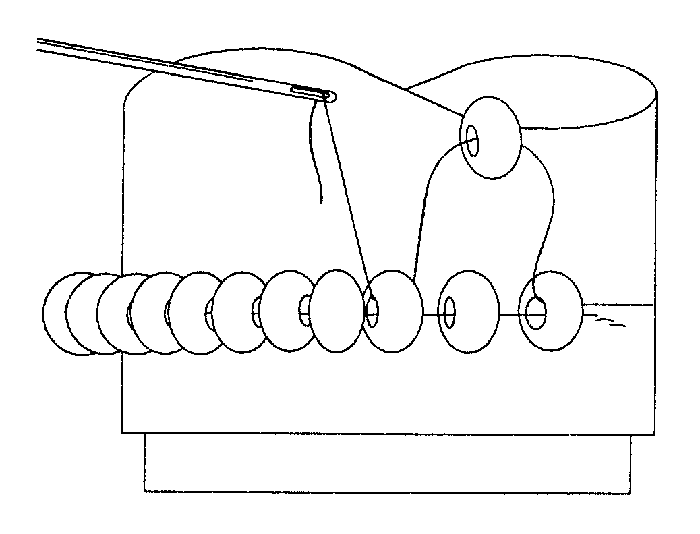
After
a few beads are added by the following sequence of taking up a new bead
and skipping a bead on the row, you will quickly notice that three beads
will always create a series of diagonal "steps". Only the very first step has only 2 beads, until the row is finished. |
 |
|
 |
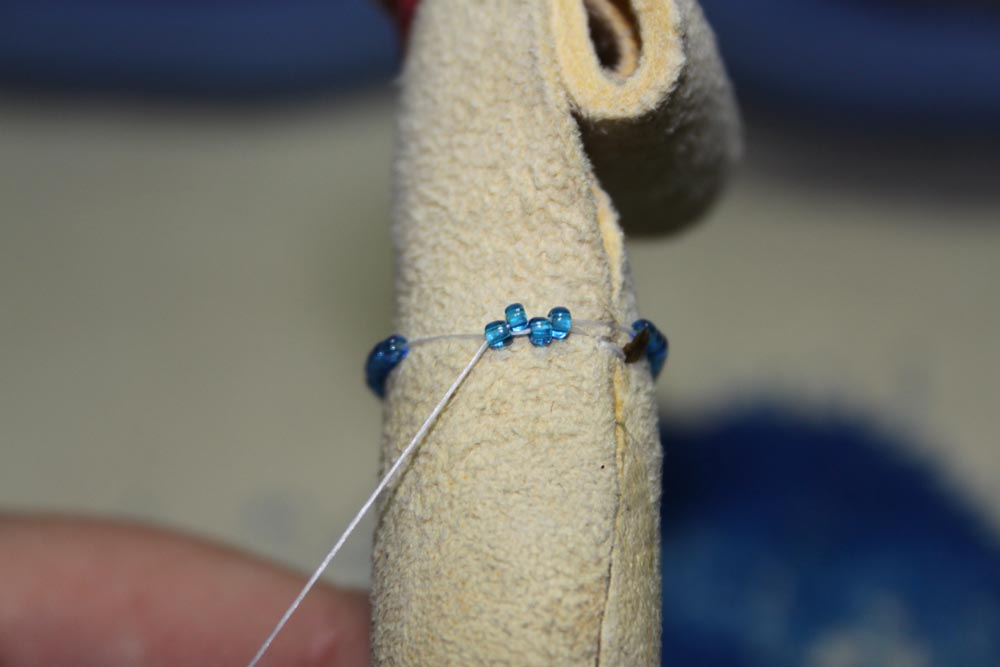
Continue in this fashion until you arrive at the last step. Then you pick up the last bead for this row and pass the needle through the two beads lying "on the way". |
 |
Now the first step with the 2 beads has three beads, too. |
This first circuit has created three rows in one run, but from now on each circuit will produce only one row.
 |
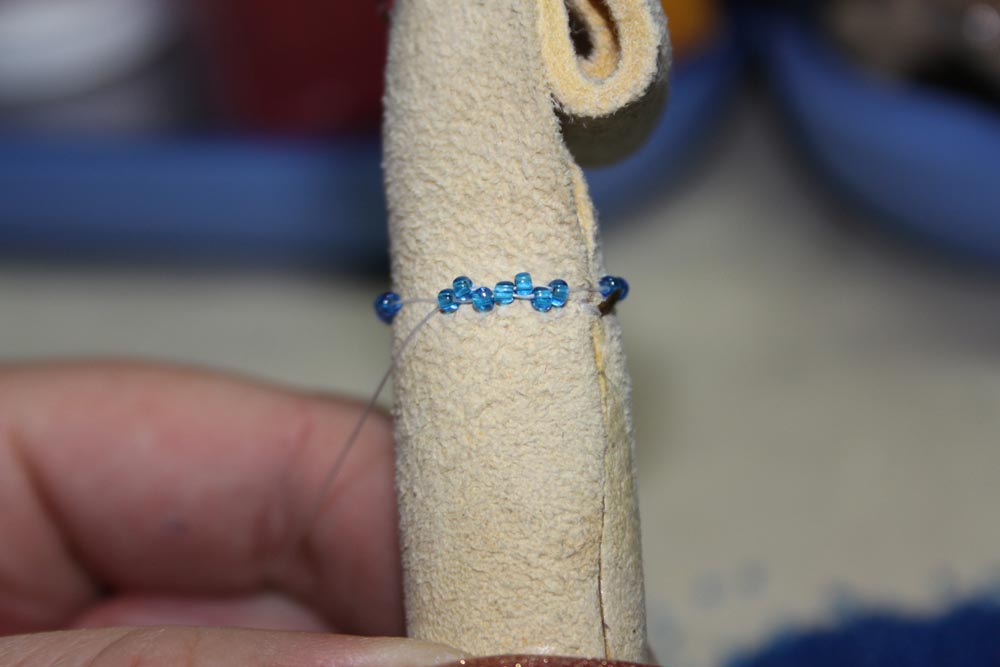
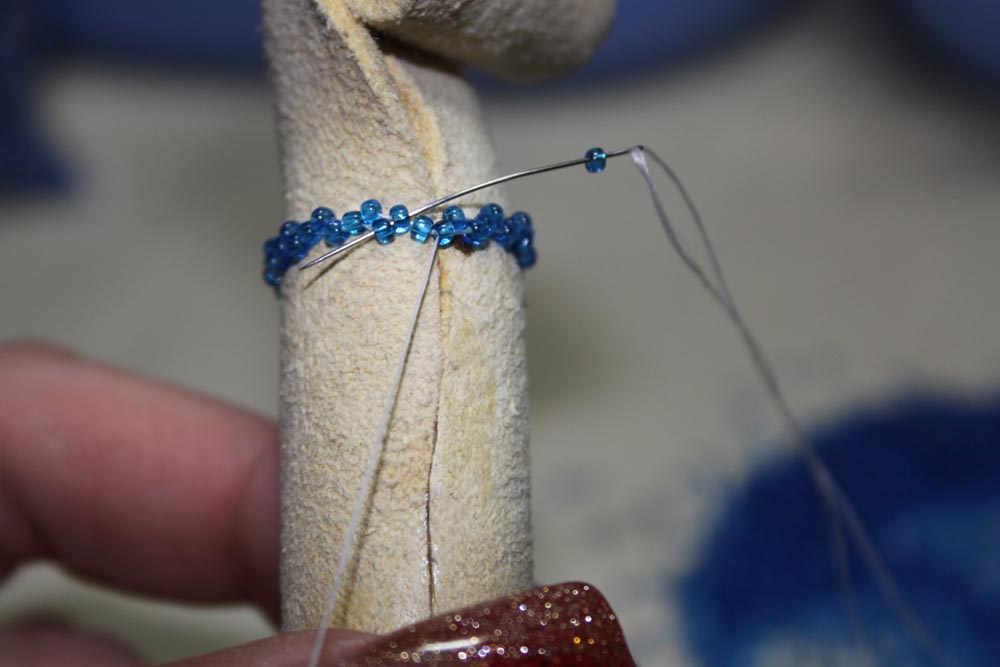
Now take up another bead. This new bead slips into the "hole" under the very first bead in the 3-step. |
 |
Here you can see the "second circuit" creating the 4th row (you can count 4 beads in the diagonal step). |
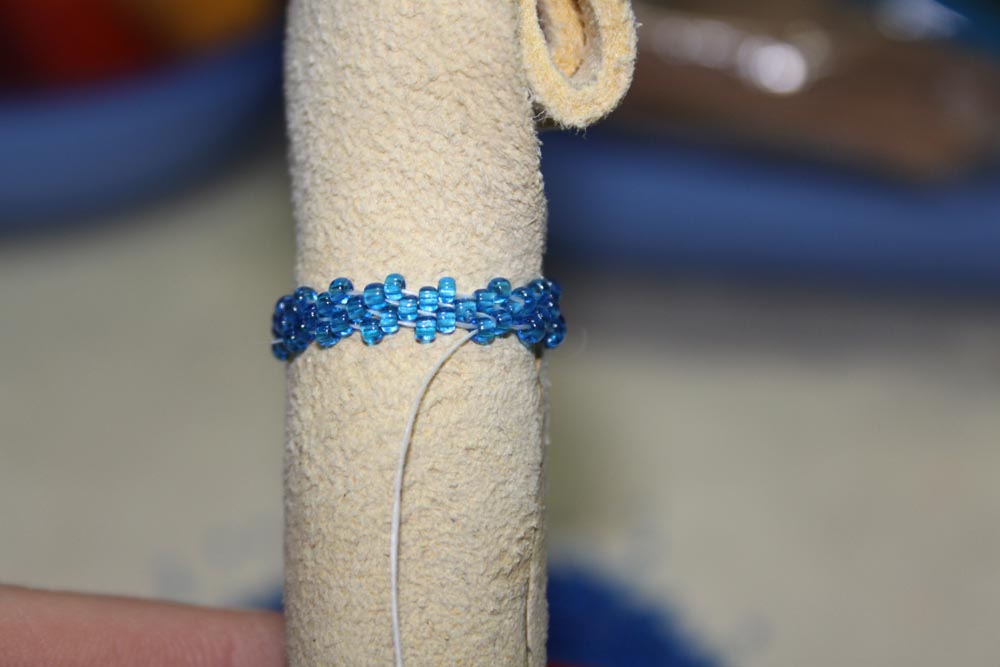 |
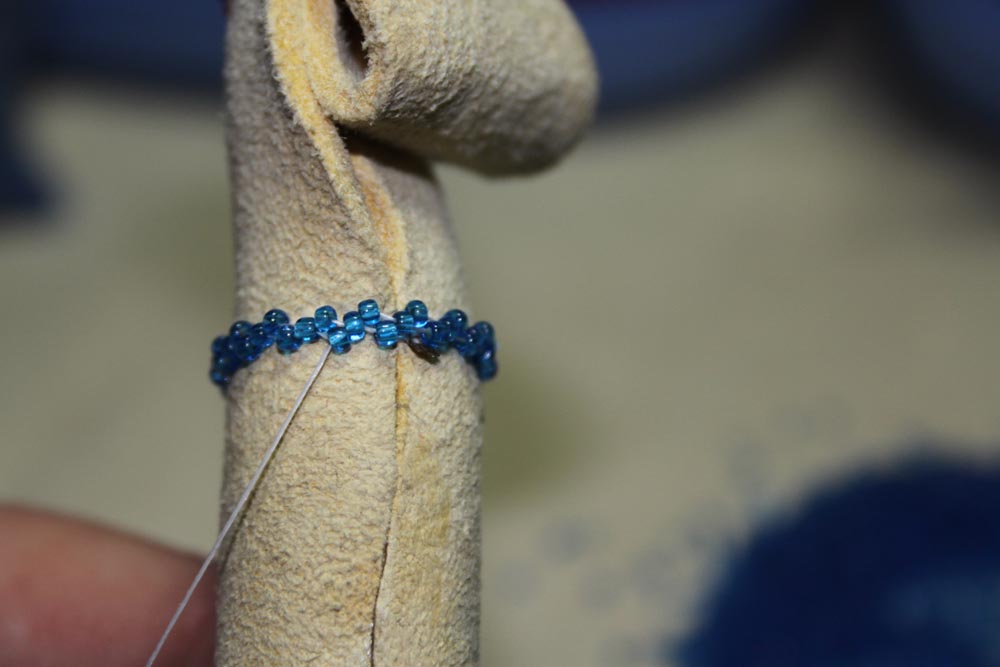
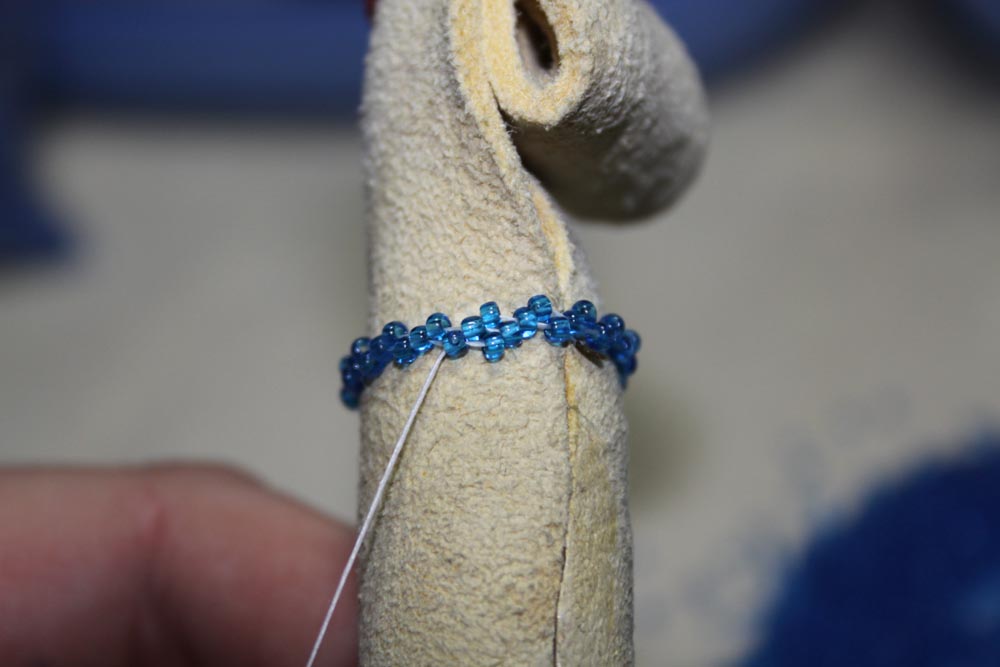
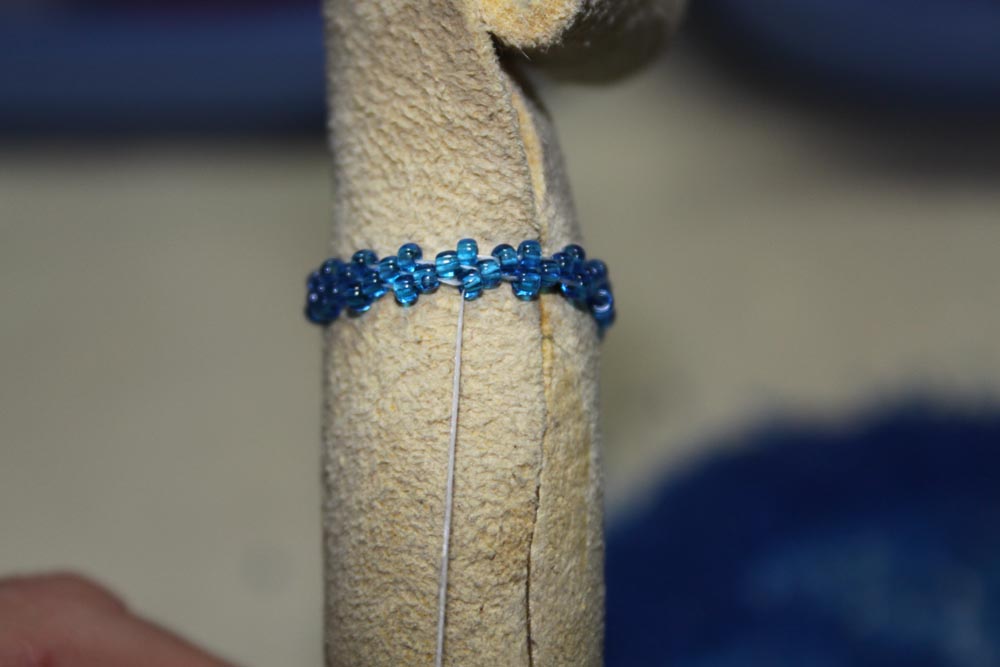
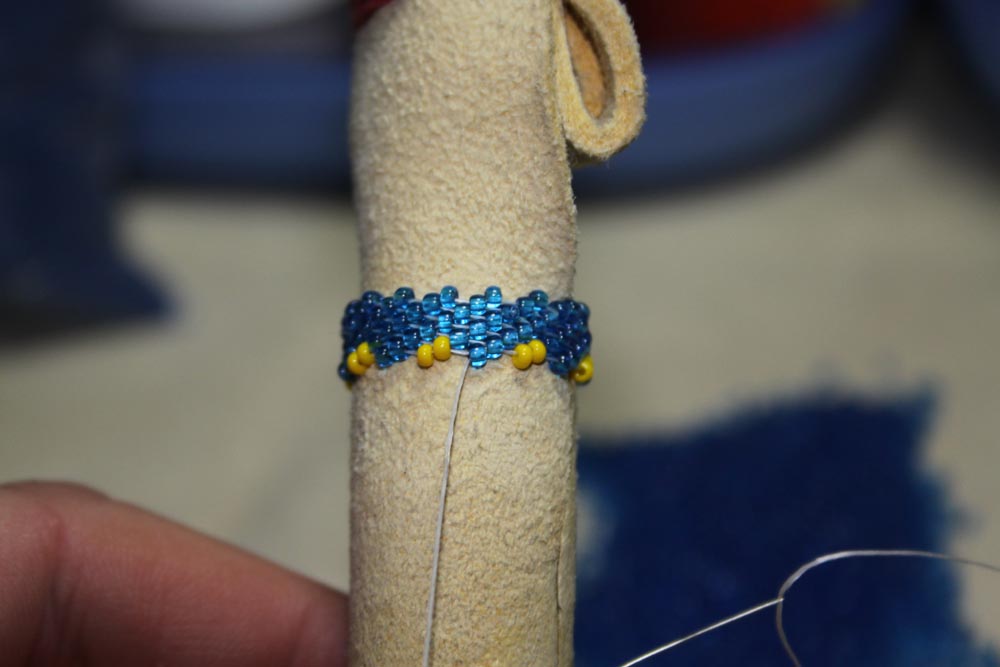
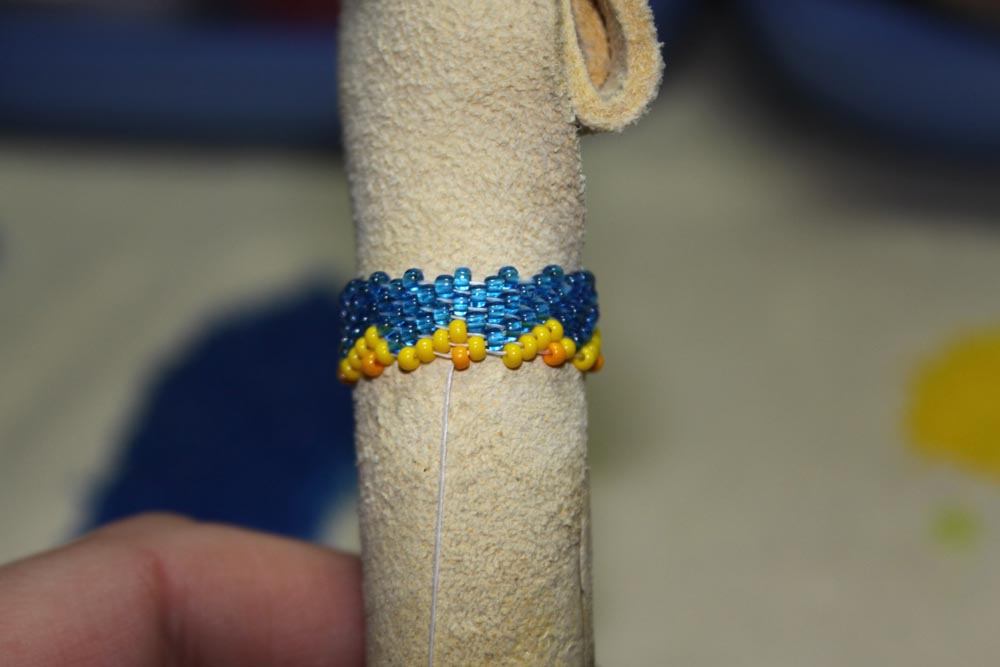
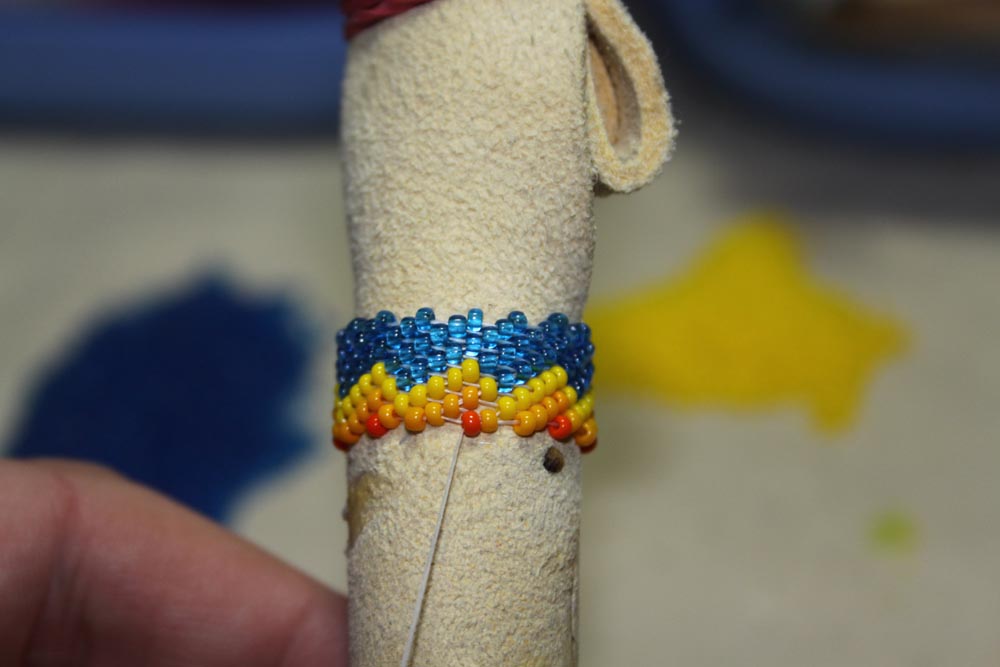
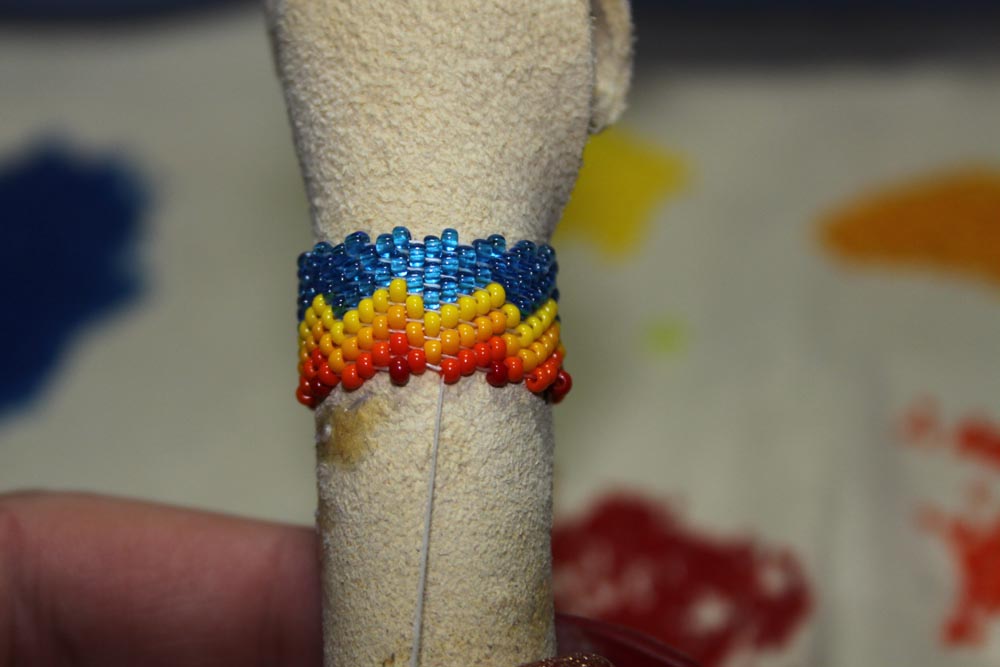
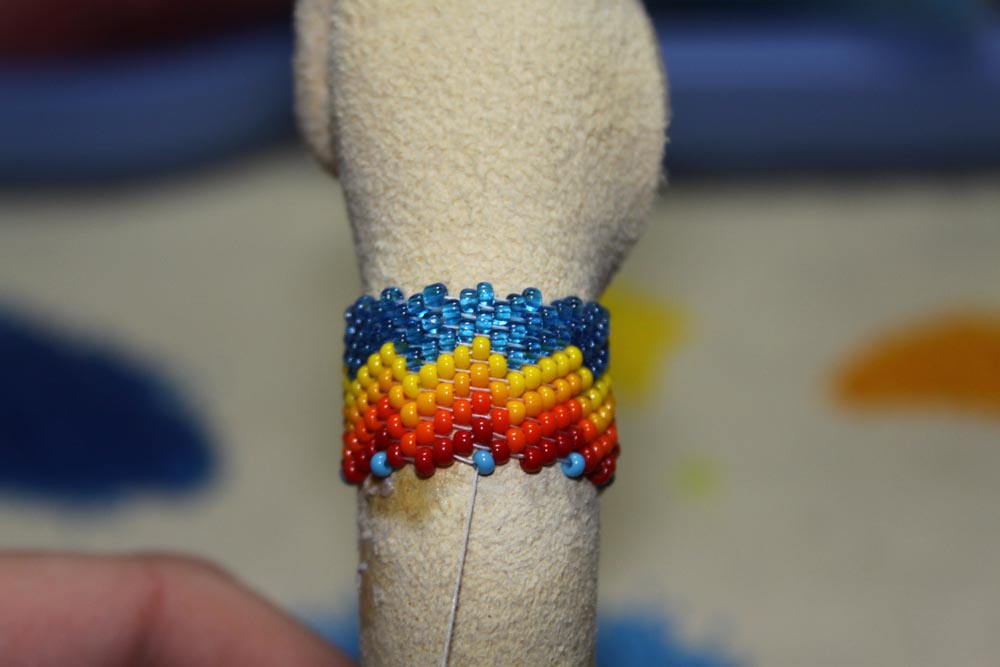
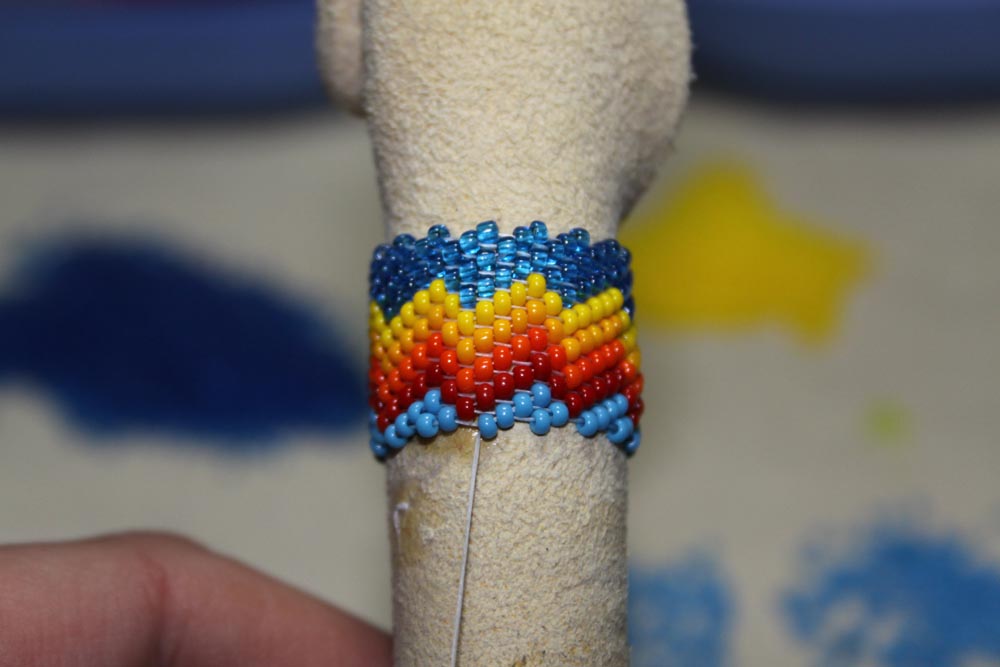
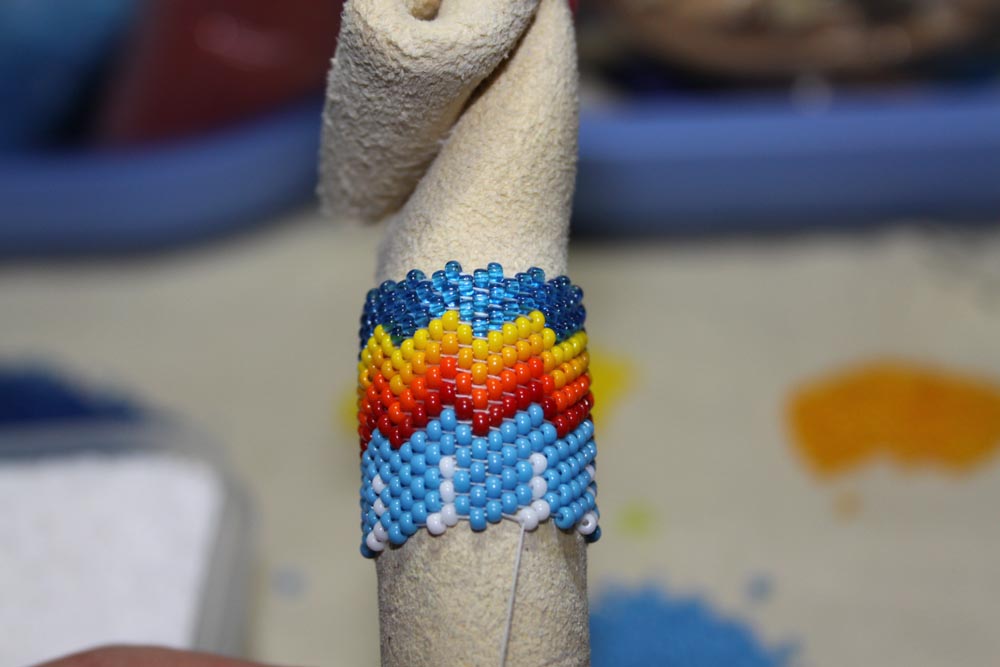
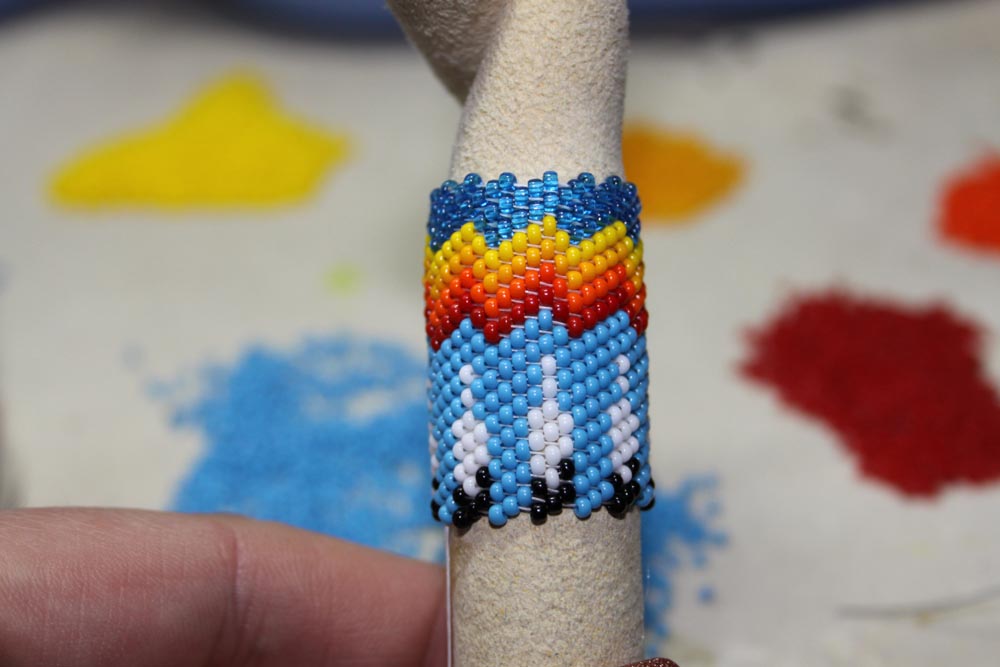
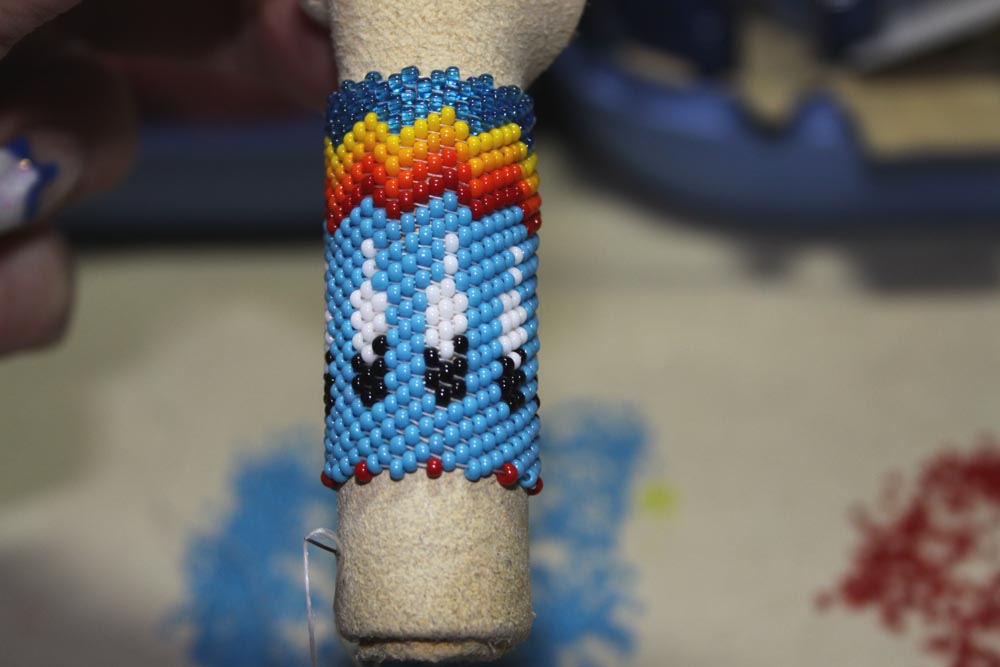
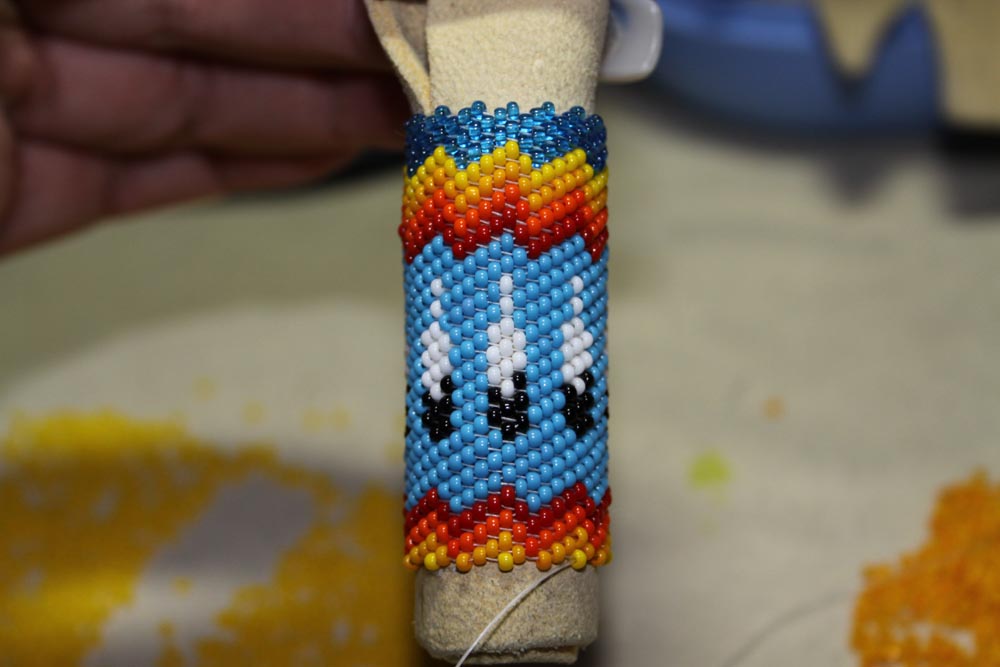
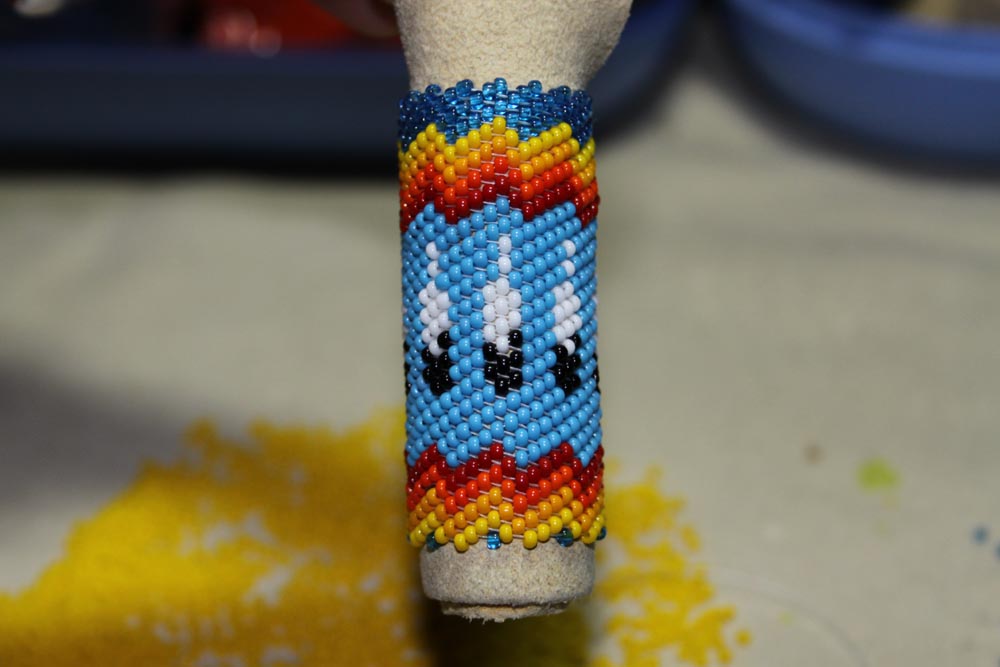
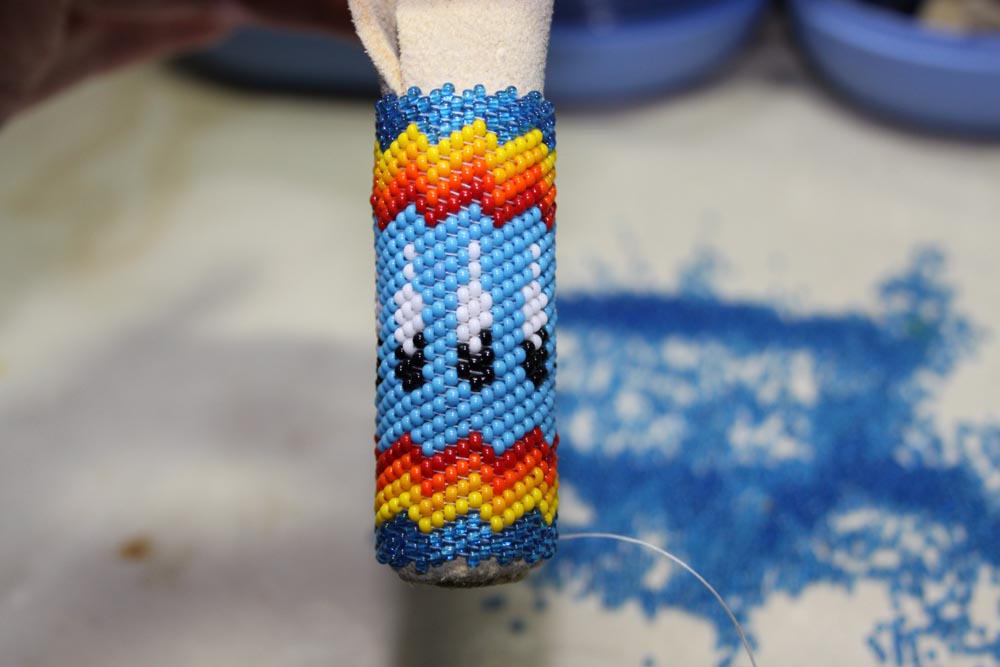
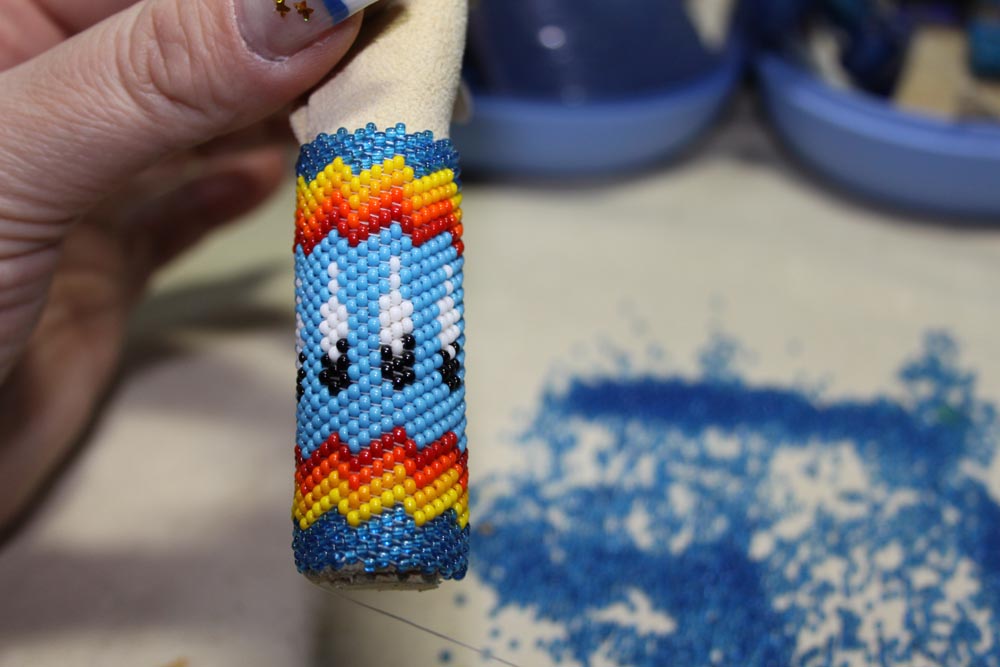
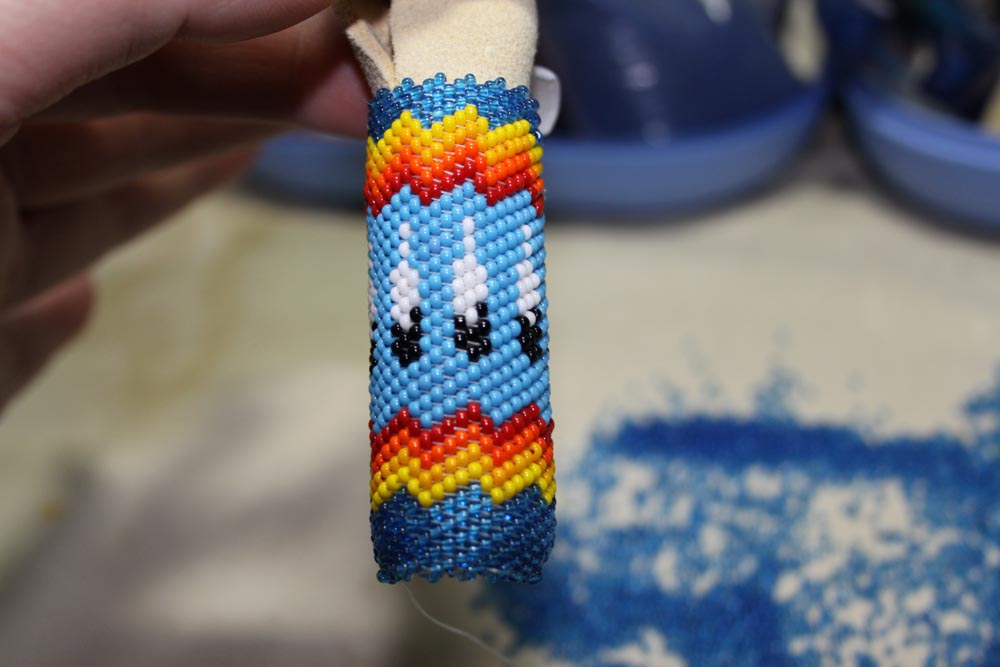
Now the first 5 rounds are finished. |
Here you can see the pattern growing!
 |
 |
 |
 |
 |
 |
 |
 |
 |
 |
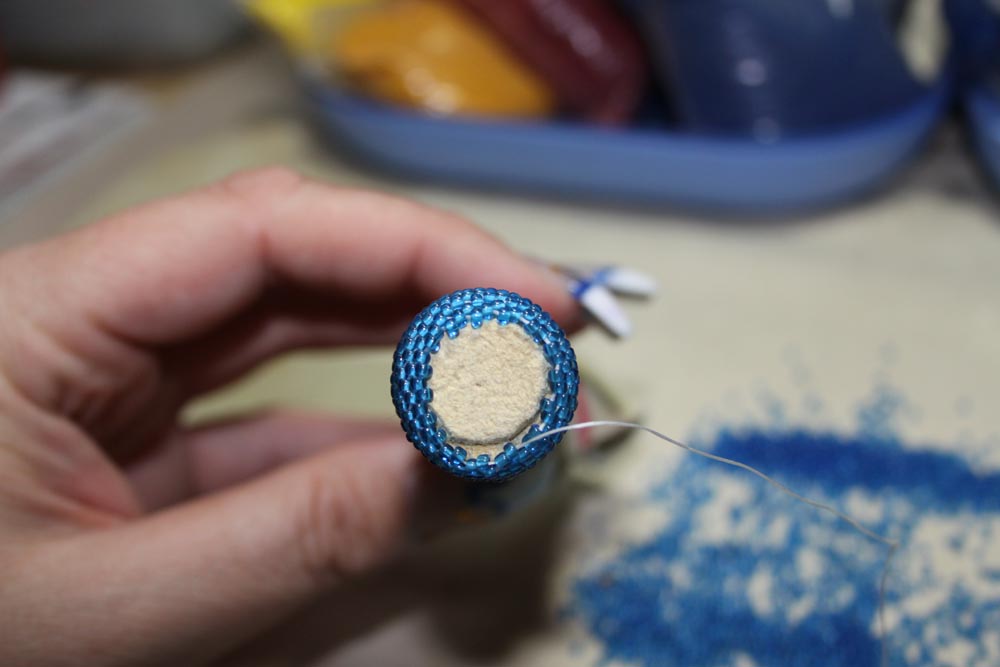
If
the end of the thread is reached, you can do it the same way, as it
is described earlier (Lane Stitch) |
 |
 |
 |
And now the ending.
 |
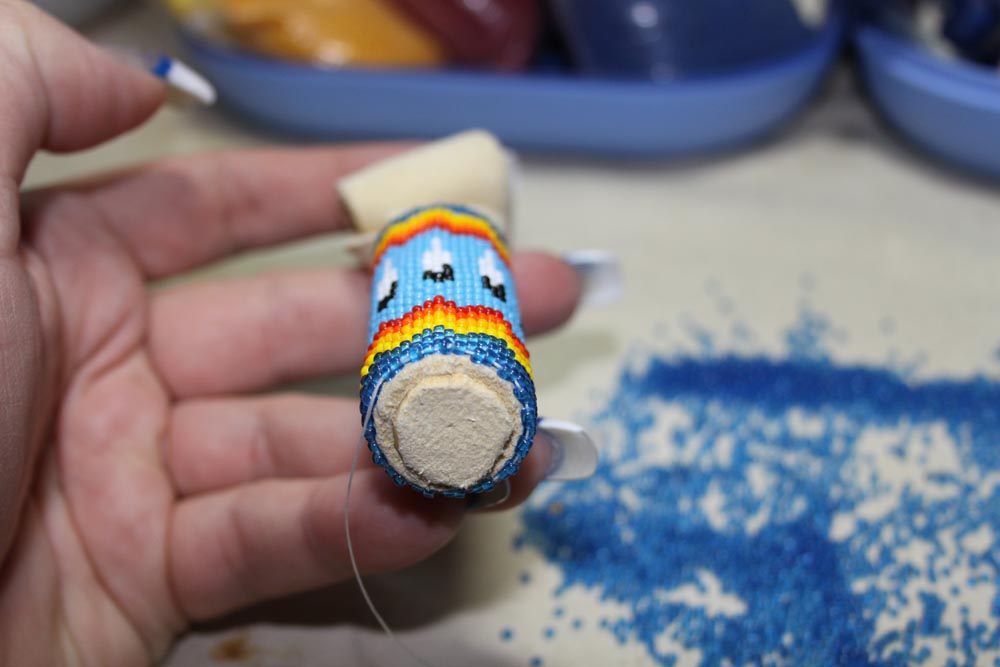
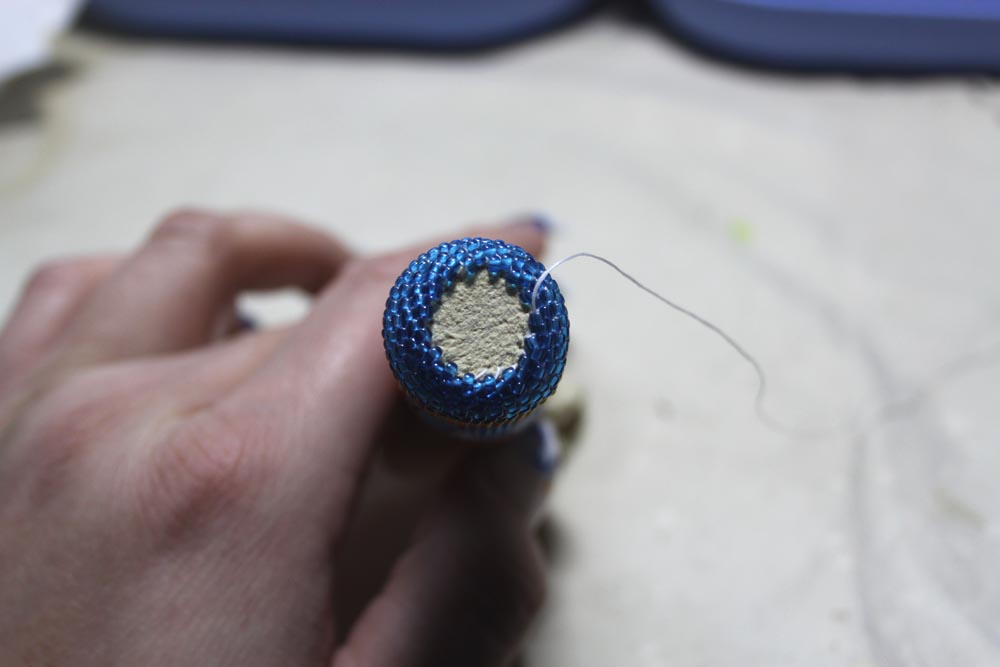
Nearing the end you have to check that the beaded rows are overlapping the core so you get a smooth edge. |
 |
We need more. |
 |
Mostly 2 or 3 rows suffice. |
 |
Now that
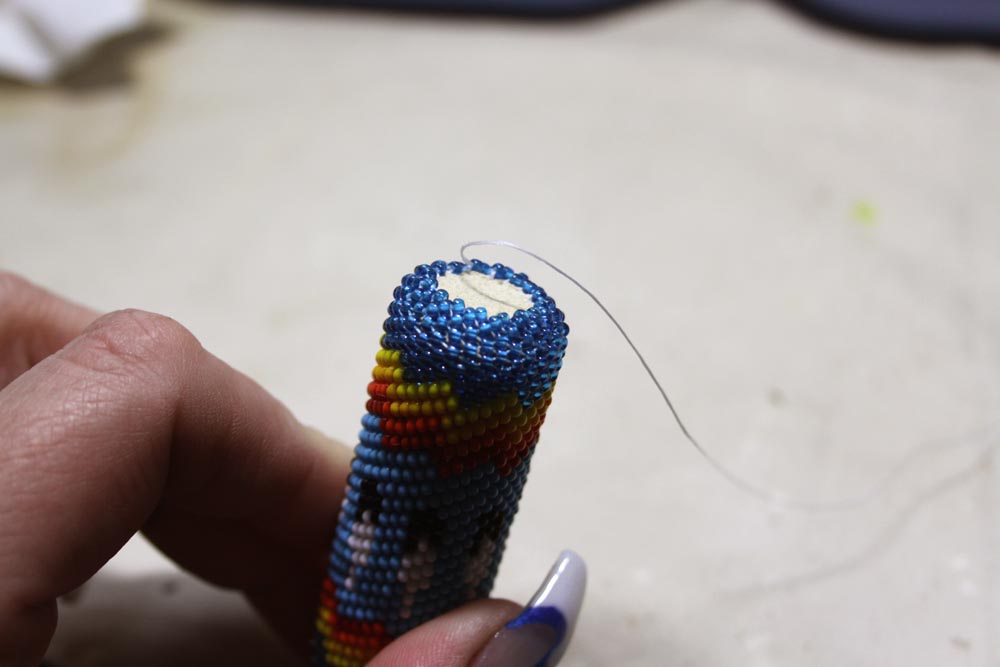
the overlap is long enough you can start fastening it. Carefully pull the thread so the overlap curves nicely around the core. |
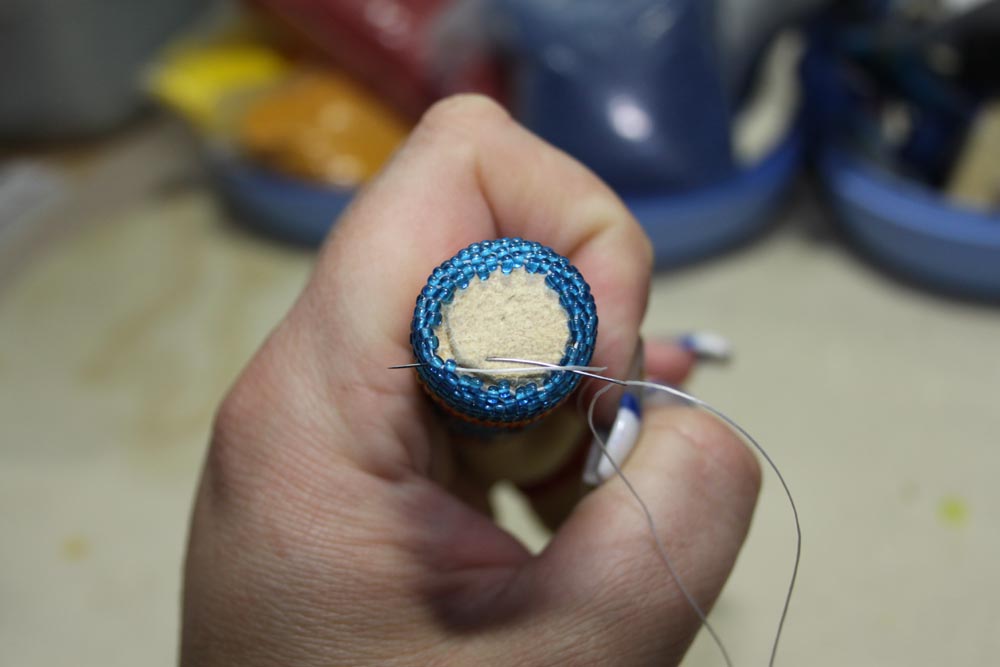 |
Make a stitch and run the needle outwards through the leather. |
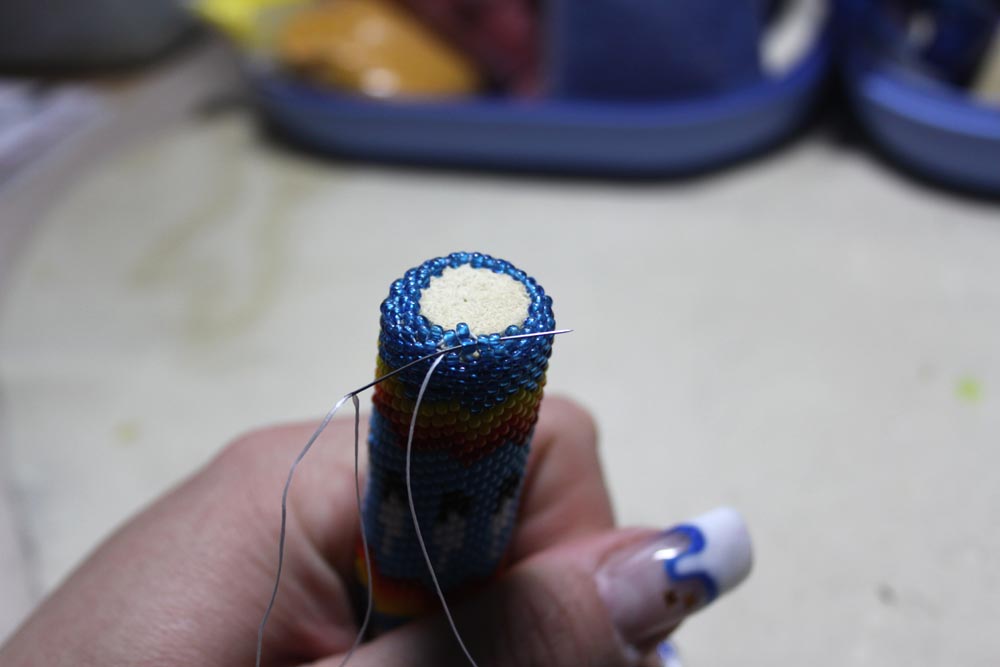 |
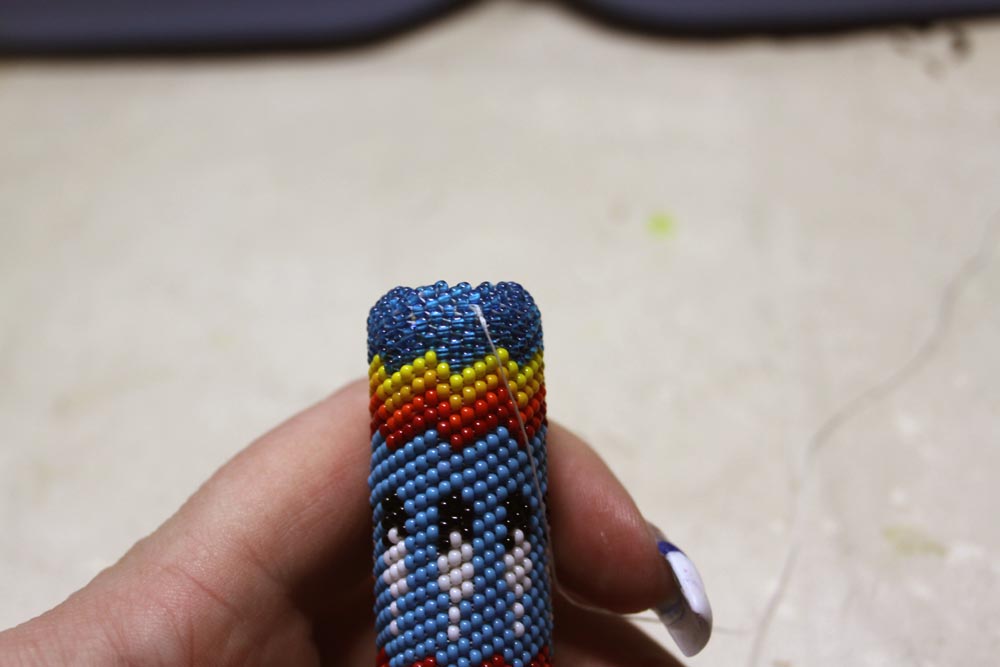
Now lead the needle back through the last 2 or 3 beads of the next row. |
 |
And again run the needle through the leather. |
 |
Now repeat the last 2 steps until you are all around. |
 |
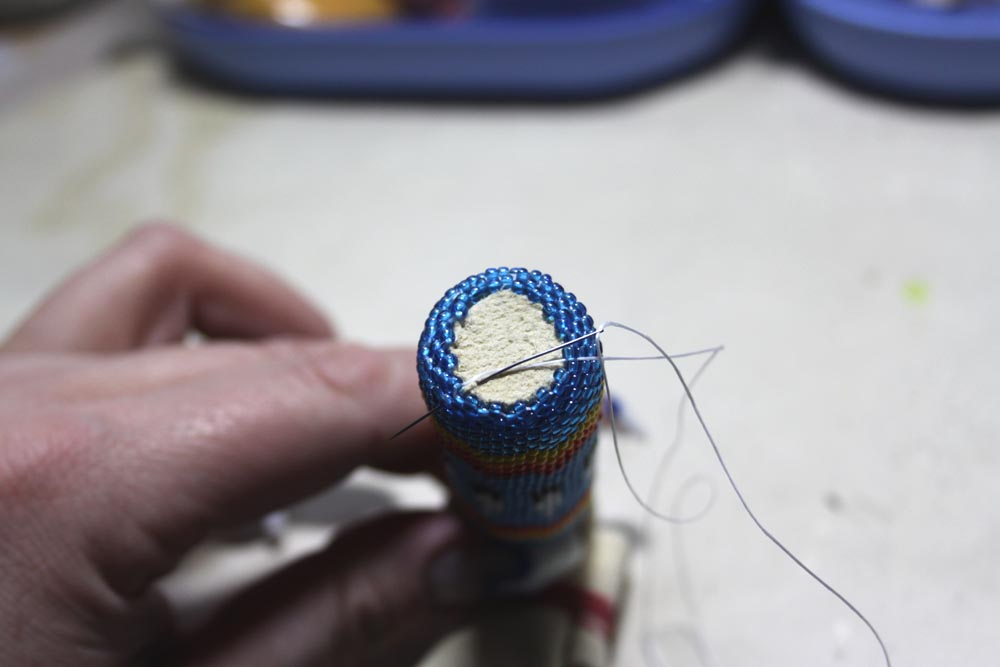
Leading the needle through the last bead after fixating it run it through the leather once more. |
 |
Where the needle comes out make a knot and melt the knob. |
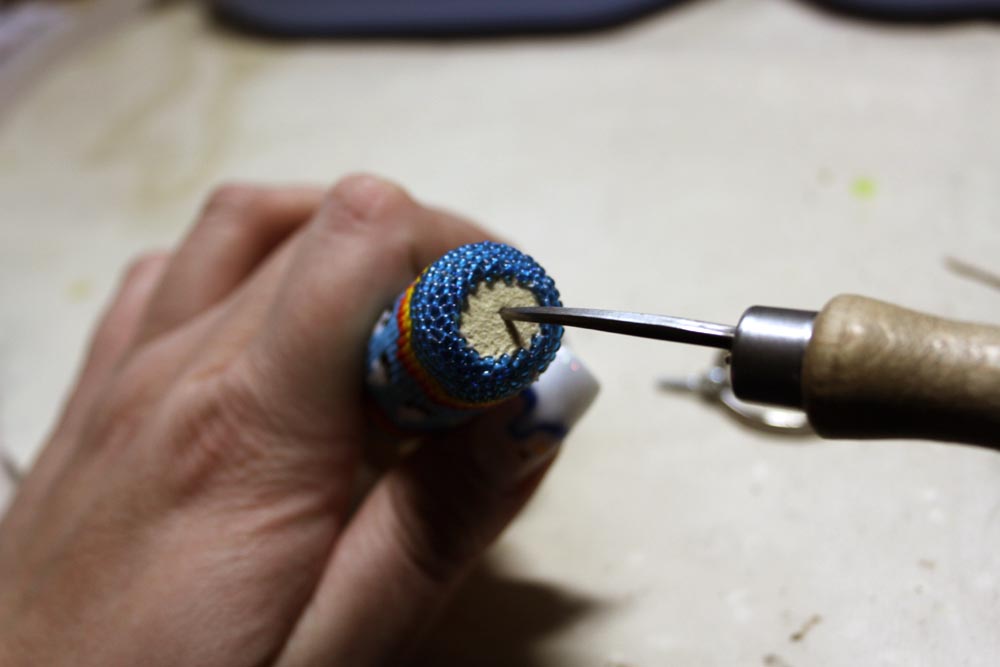 |
Now take an awl and bore a hole for the ringscrew down to the wood. Doing so it will be easier to screw it in. |
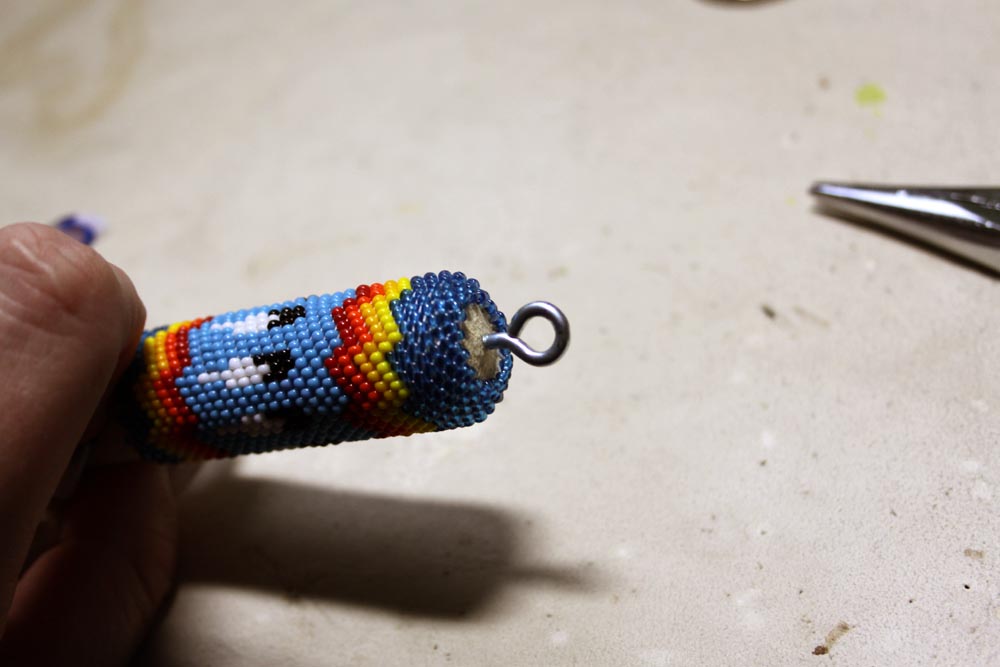 |
I normally take pliers to get a better grip and screw the ringscrew into the wood. |
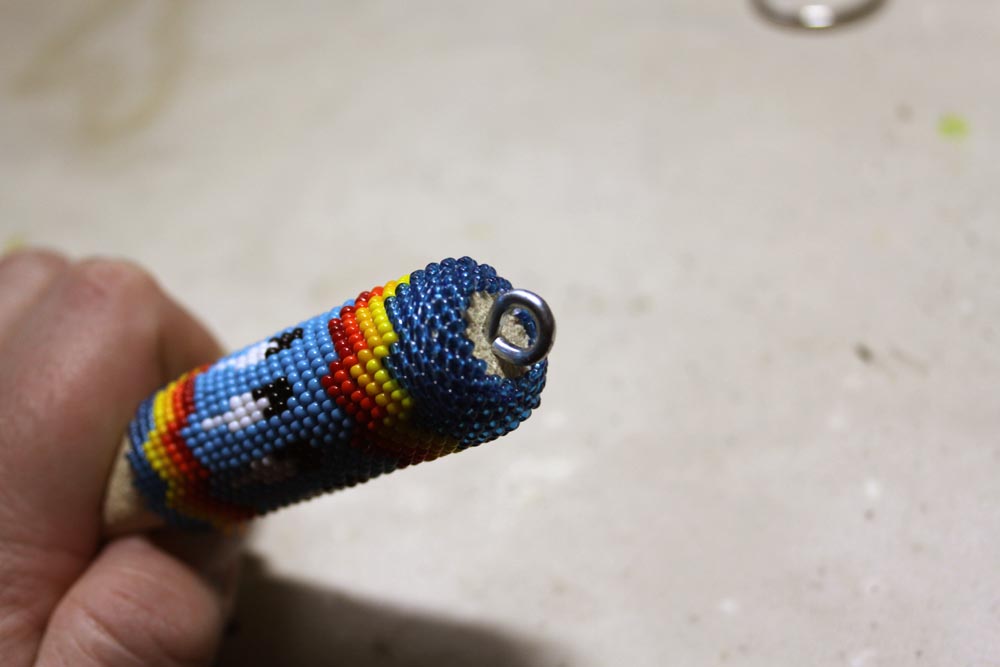 |
Screw all the way in. |
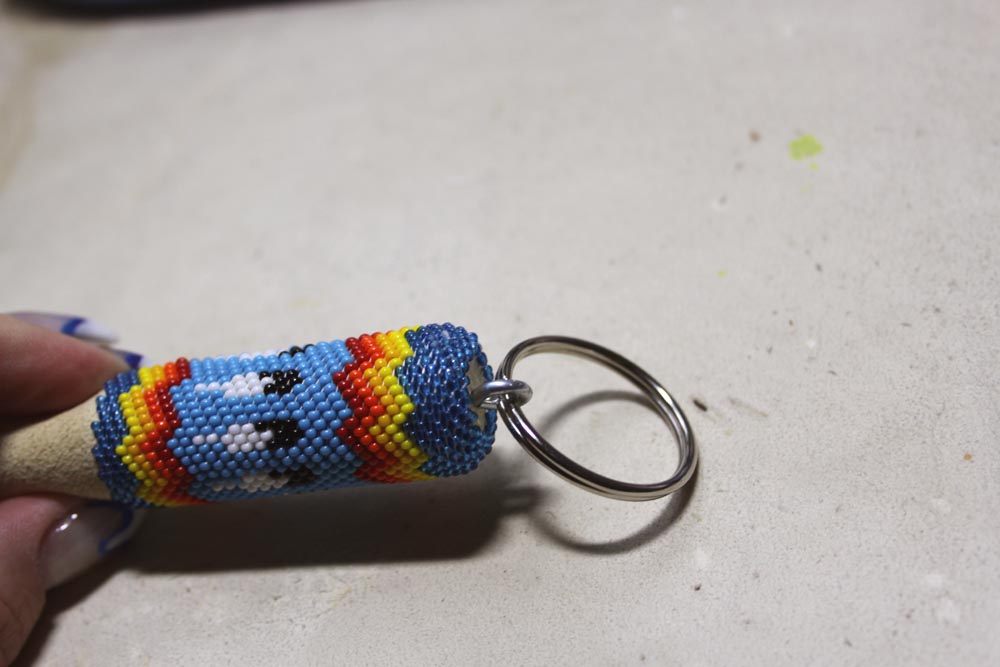 |
Add the keyring. |
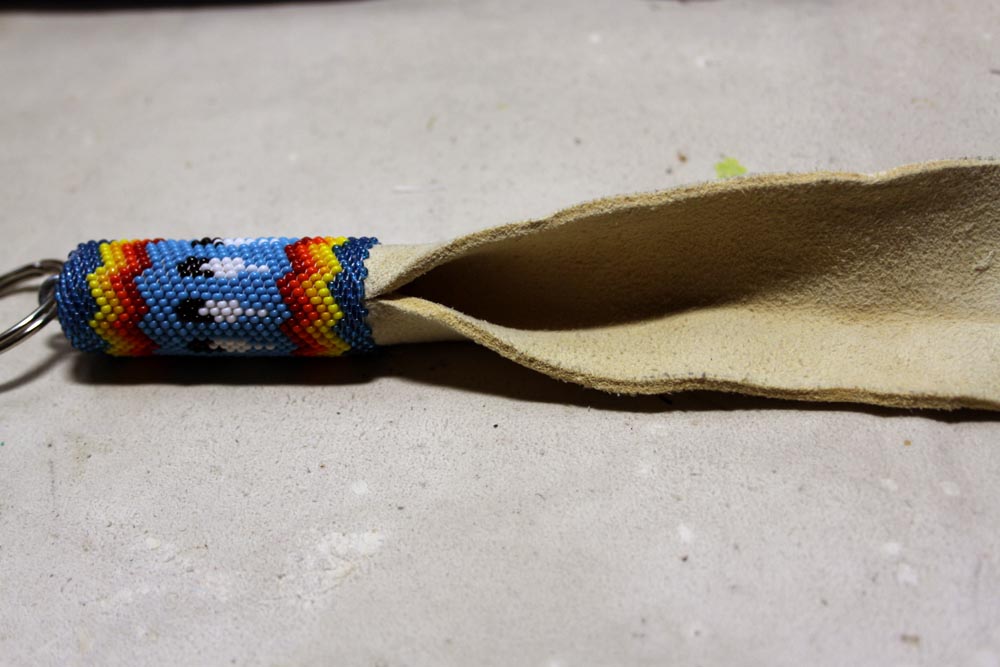 |
Now we can remove the rubber band from the fringe leather. |
 |
Cut the fringes. |
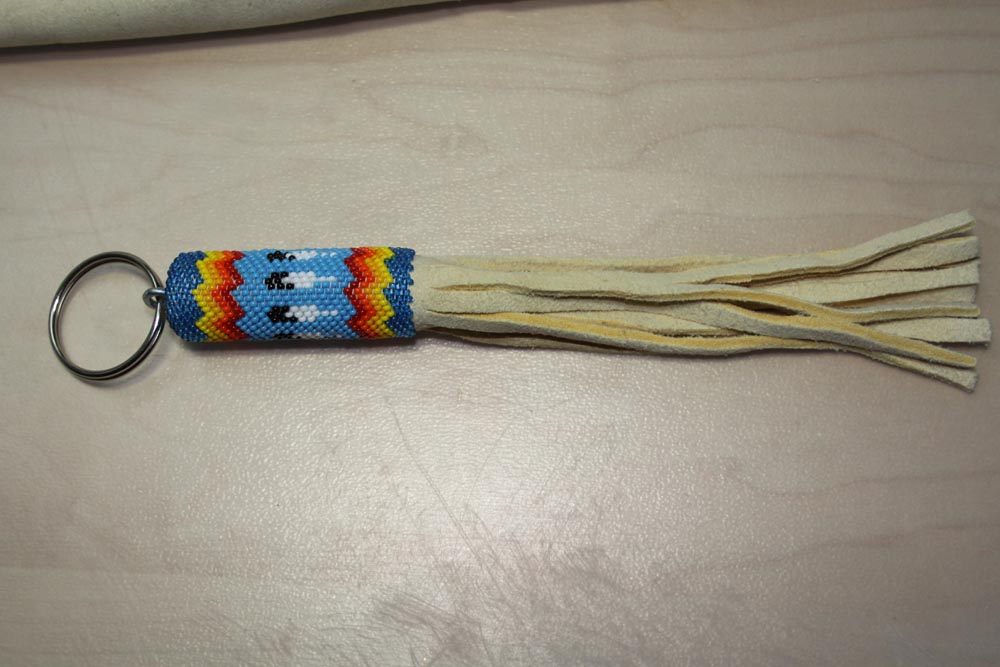 |
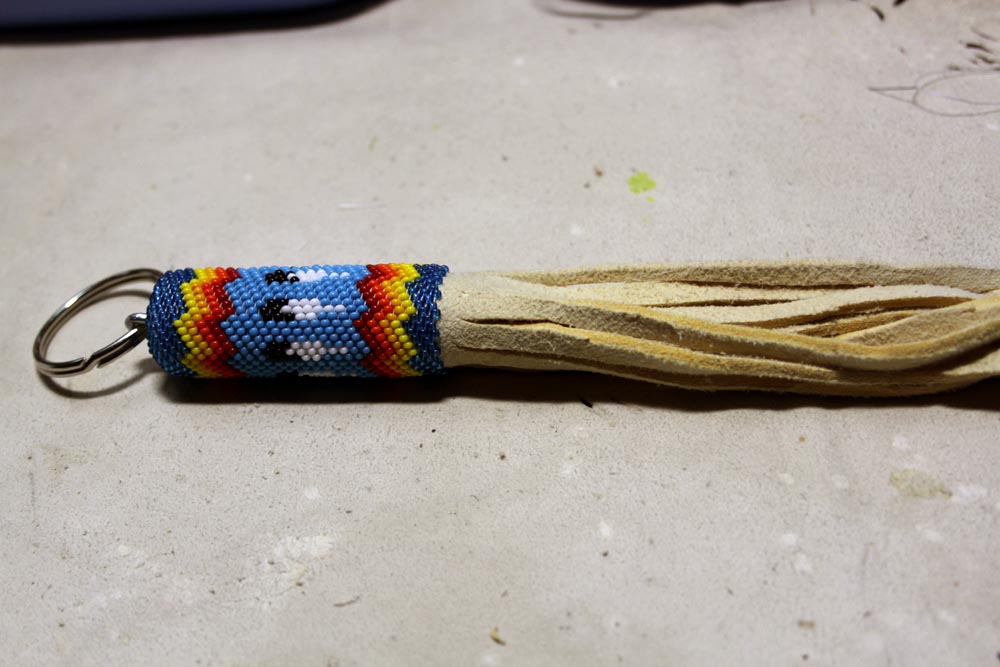
And here is the finished item. |
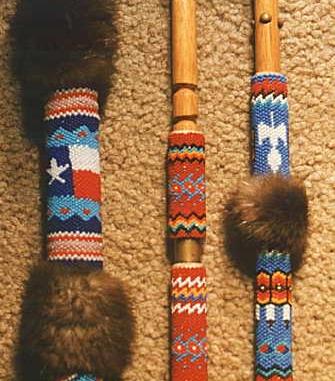
Here are a few examples of peyote beadwork:
 |
 |
 |
|
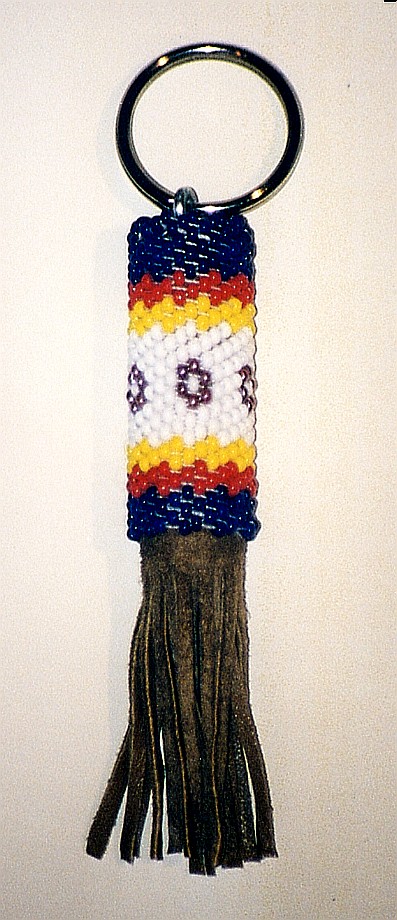
(c)
KQ Designs |
(c)
KQ Designs |
||
 |
 |
 |
|
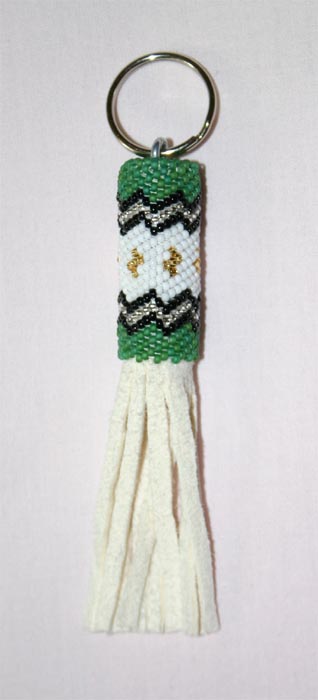
(c)
Rainer Krenn www.lakota-info.at |
(c)
Rainer Krenn www.lakota-info.at |
(c)
Rainer Krenn www.lakota-info.at |
(c)
Rainer Krenn www.lakota-info.at |
All
those keyrings have about the same size: |
diameter:
1.7cm |
length:
10.5cm without the ring (5cm fringes) |
|
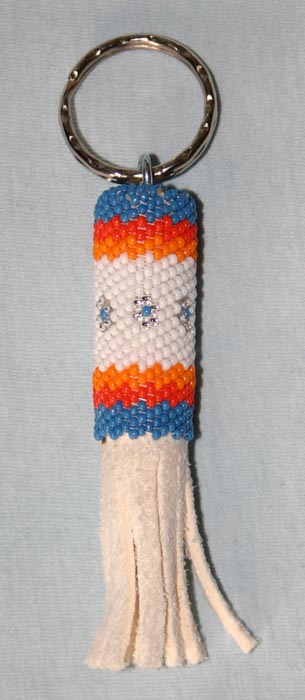
Here
the keyrings I made as christmas presents in 2004.
|
|||
 |
|||
| This
one I made for myself. |
I
like those colors! |
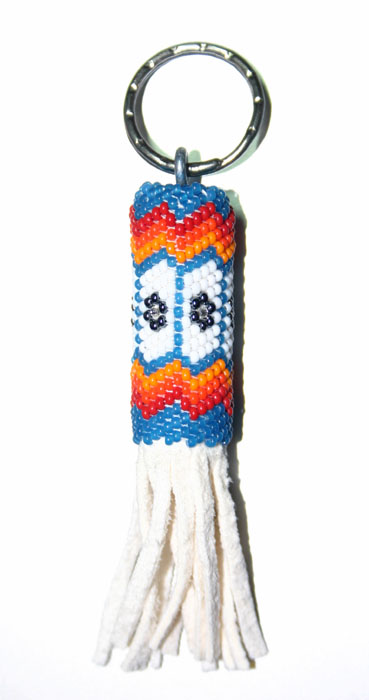
Birthday
present for a dear fried of mine |
Here is a slightly different version to the former one. |
 |
 |
||
| Another variation of one of my favourite patterns. |
|||
|
At
one point I decided to make slightly bigger ones: |
diameter:
2cm |
length:
15.5cm without the ring (9cm fringes) |
|
|
|||
 |
 |
||
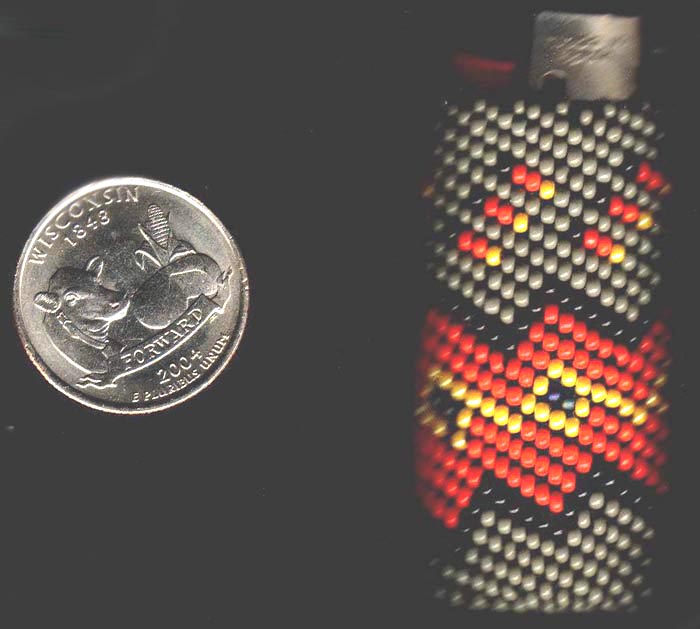
This
lighter cover has crafted by |
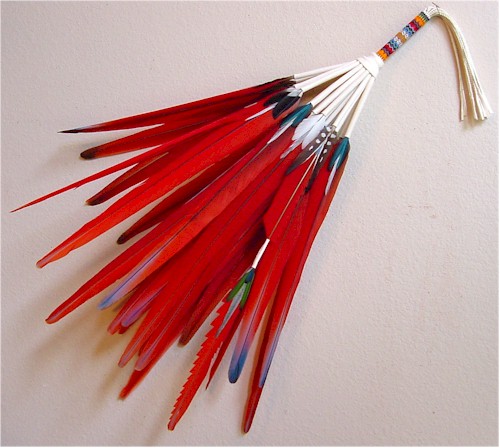
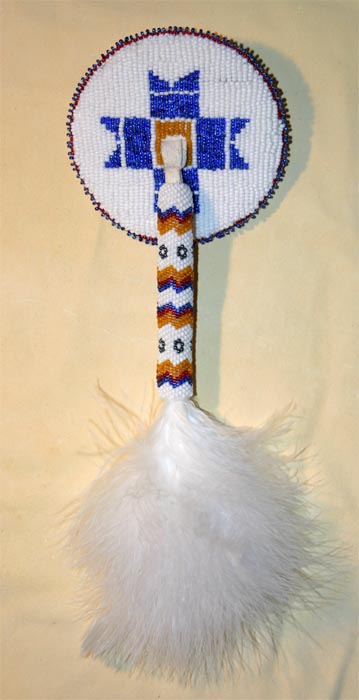
This
is the peyote part of my new headdress. |
This
is the complete headdress. |
|
Here you can download the graph paper to create your own designs.
 |
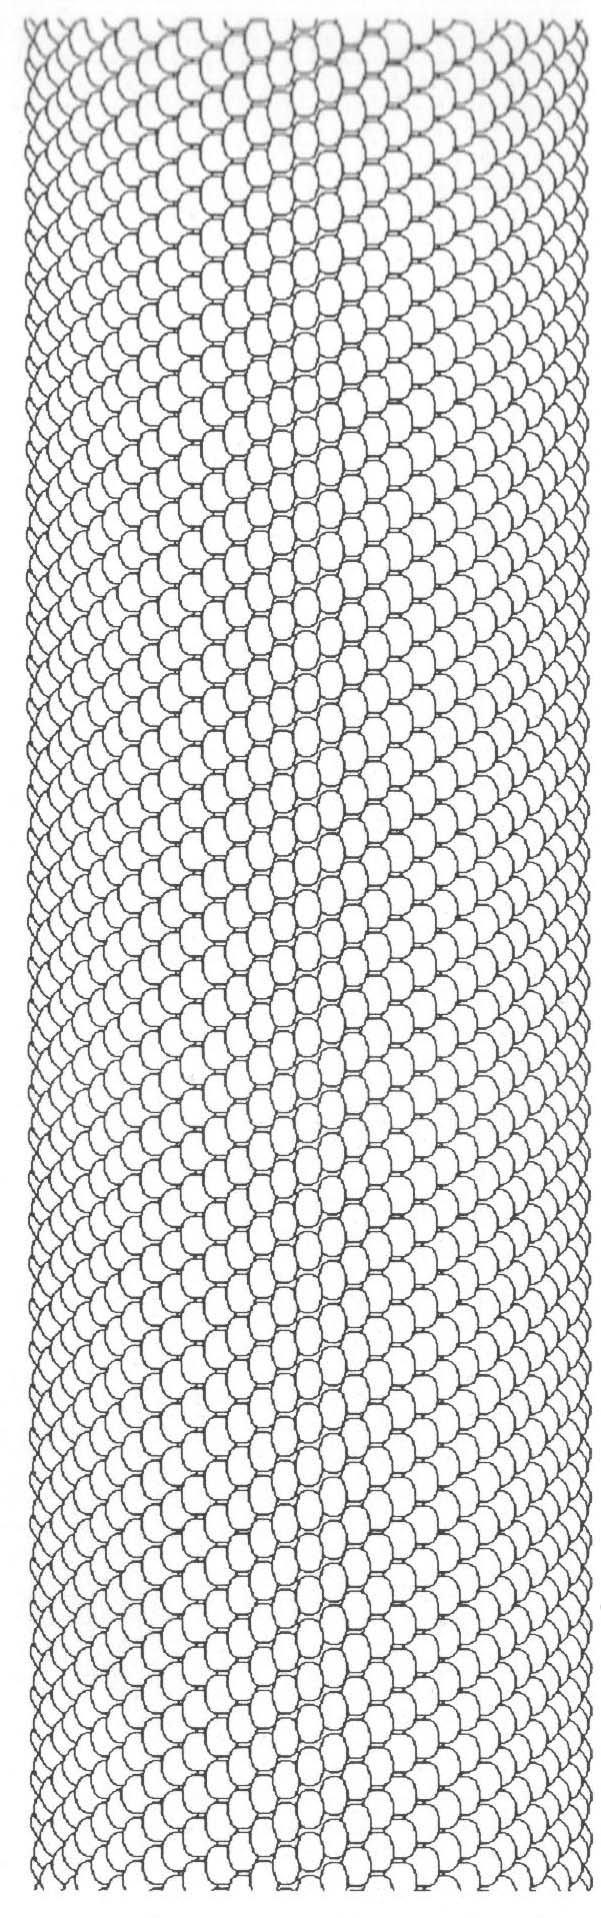 |
Spirals
descending to the left |
Spirals
descending to the right |